The Template Management screen consists of the following sections:
The Filtering section enables you to filter by correspondence type and document category to view existing template records.
You can also filter by entering text in the Title field without selecting a document category. The module will then display all templates with that word in the title.
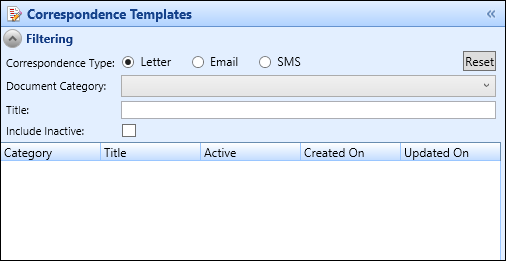
The fields in the Filtering section are described in the following table.
| This field | Holds this information... |
|---|---|
| Correspondence Type |
The type of correspondence the template is associated with. Select from:
|
| Document Category |
The document category for the correspondence. Select from:
Selecting one of the options will populate the grid under the Filtering section with all templates associated with the selected document category for the correspondence type. |
| Title | Search field that can be used to search all document categories for a specific template. |
| Include Inactive | Whether inactive templates are displayed on the grid below the Filtering section with the active templates. |
When you have selected a document category or entered characters in the Title field, a grid will display. This grid shows a list of templates based on the values set in the Filtering section.
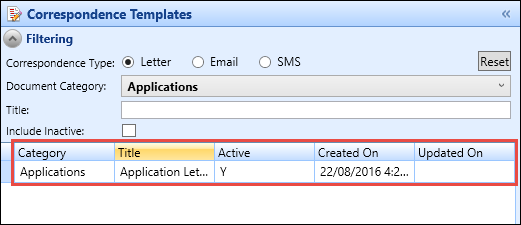
The Template Details section displays the template selected in the Filtering section. This section is split between the Template Details and Information tabs.
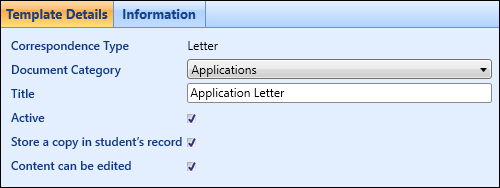
The fields on the Template Details tab are described in the following table.
| This field | Holds this information... |
|---|---|
| Correspondence Type | The correspondence type the template is associated with (read-only). This cannot be amended for an existing template. |
| Document Category |
The document category the template is associated with. If required, select a different category to associate the template with from the drop-down list. The selection of the document category will also determine what merge fields are available in the template body section. |
| Title | The name of the template. |
| Active | Whether the template is currently active. |
| Store a copy in student's record | Whether a copy of the generated correspondence will be automatically stored in the learner's record. If this is set then the setting in the Correspondence Wizard will be locked so it cannot be amended. |
| Content can be edited | Whether the contents of the correspondence can be edited by the user when being generated. |
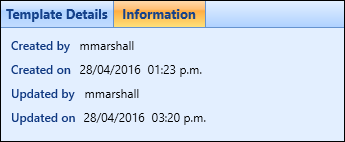
The Information tab displays the user who created the selected template and when it was created, and also the user who last updated the selected template and when it was updated if applicable.
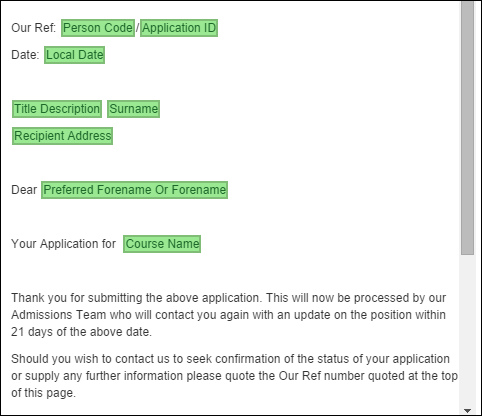
The template body section contains the text and style of the correspondence that will be sent.
For the Email correspondence type, a Subject field will be visible in the template body. This is to hold a pre-defined subject for the email template.

Clicking the body of the template will display the editing panel, which provides formatting options that can be added to the template. These panels will change depending on the correspondence type of the template.

A tooltip will display above the panel when hovering your cursor over a button, enabling you to see what each button does.

The SMS panel displays the current character count and the character limit set in the Maximum characters for SMS (text messages) institution setting. This will go red if the character limit is exceeded.
The following table describes what each of the formatting options does in the editing panel.
| Option Button | Option Name | Does the following... |
|---|---|---|
|
|
Cut | Cuts the selected text from the document body and stores it in the clipboard. |
|
|
Copy | Copies the selected text from the document body and stores it in the clipboard |
|
|
Paste | Pastes the contents of the clipboard into the document template. |
|
|
Paste as plain text | Pastes the contents of the clipboard in the document template, removing any formatting from the pasted text. |

|
Paste from Word | Pastes the contents of the clipboard into the document template, keeping any Word formatting as it is pasted. |
|
|
Undo | Undoes the previous change to the template. |
|
|
Redo | Revokes the last Undo function. |

|
Paragraph Format | Enables you to change the paragraph format for the currently selected paragraph in the template. |

|
Font Name | The font name for the selected text. |

|
Font Size | The font size for the selected text. |

|
Remove Format | Removes any formatting from a selected piece of text. |

|
Insert/Remove Numbered List | Adds a numbered list to the template. You can remove the list by clicking the button again while the numbered list is selected. |

|
Insert/Remove Bulleted List | Adds a bulleted list to the template. You can remove the list by clicking the button again while the numbered list is bulleted. |

|
Decrease Indent | Decreases the indent of a paragraph if one exists. |

|
Increase Indent | Increases the indent of a paragraph. This can also be used to create nested lists by clicking the button while on a numbered or bulleted list. |

|
Text Direction from Left to Right | Sets the text to flow from left to right. |

|
Text Direction from Right to Left | Sets the text to flow from right to left. |

|
Bold | Sets the selected text to a bold format. |

|
Italic | Sets the selected text to an italic format. |

|
Underline | Underlines the currently selected text. |

|
Strike Through | Strikes a line through the currently selected text. |

|
Subscript | Enables you to add smaller text slightly below the line of type. |

|
Superscript | Enables you to add smaller text slightly above the line of type. |

|
Text Colour | Enables you to change the colour of the text. Click the button to select the colour you want to change the text to. |

|
Background Colour | Enables you to change the background colour of the text. Click the button to select the colour you want to change the text to. |

|
Align Left | Aligns the text to the left. |

|
Centre | Aligns the text to the centre of the template. |

|
Align Right | Aligns the text to the right. |

|
Justify | Sets the current paragraph to be justified text. |
|
|
Image | Enables you to add an image to the template. A window will display where you can either select a URL or a local file to be added. |
|
|
Table | Adds a table to the template. A window will display where you can select the amount of rows and columns, as well as the width and height of the table on the template. |

|
Repeated Row |
Used in tables to allow for repeated child information to be displayed over repeated rows (for example: an enrolment that has multiple fees). To add a repeated row:
|

|
Insert Horizontal Line | Adds a horizontal line to the document. |

|
Insert Special Character | Opens a window so you can select a special character to the template. |

|
Insert Page Break for Printing | Creates a page break on the template, enabling you to add multiple pages. |
|
|
Find | Opens a window that enables you to search for a word in the template. |
|
|
Replace | Opens a window that enables you to find text in a template and replace it with other text. |
|
|
Select All | Selects everything in the template. |

|
Show Blocks | Breaks the template into blocks such as different paragraphs. |

|
About CK Editor | Displays information on the editor, including a link to the editor user guide. |
|
|
Link |
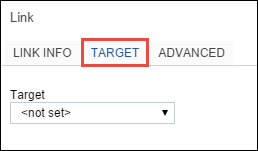
Opens a window that enables you to add a link type. This can be a URL, a link to an anchor in the template text or an email address. You can also click the Target tab to decide what happens when the user clicks the link.
This button is only available for the Email correspondence type. |
|
|
Unlink |
Removes the link from selected text. This button is only available for the Email correspondence type. |

|
Anchor |
Adds an anchor to the template, enabling you to set a link that users will be able to click on to go directly to the anchor. This button is only available for the Email correspondence type. |
The Merge Fields section lists EBS database fields that can be added to a correspondence template. What fields are available will depend on the context of the template that is currently open.
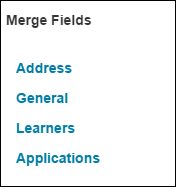
The following standard merge field types are available:
- Address
- General
- Learners
These are available for each of the different document categories, as well as a context dependant set of fields (for example: for the Application document category, there is a set of merge fields specific to a learner's application).
To add a merge field to a template:
-
Open a template so the template body is displayed.
-
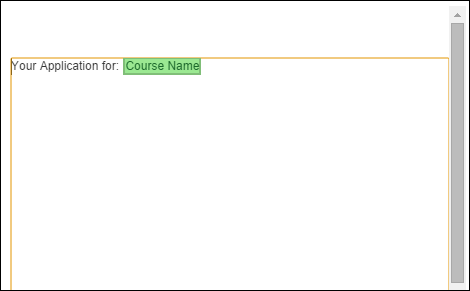
Place the cursor on the body where you want to add a merge field.
-
Select the required merge field.
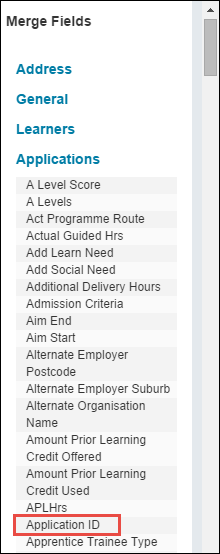
The merge field will be added to the body template and will be highlighted in green.

To delete a merge field from a template, put the cursor before the merge field you want to delete and press Delete.
