When you have created curriculum plan records, you can add and update features of a plan for your institution.
From the Curriculum Planner screen, you can:
You can change the parameters the funding model uses on the Funding Model Parameters window. This can be accessed by clicking the Funding Model Parameters button on the Curriculum Planner ribbon.

The Funding Model Parameters window is displayed, which contains generic values populated by Tribal based on the funding year and model but should be changed to reflect the institution’s values and targets.
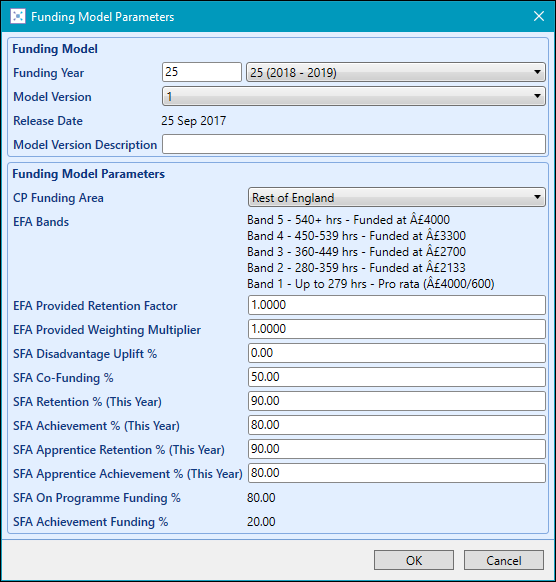
The funding model parameters can be differ depending on the funding year and model version.
The additional fields on the Funding Model Parameters window are described in the following table.
| This field | Holds this information... |
|---|---|
| CP Funding |
The area your institution is based in. This is factored into the disadvantaged uplift funding. This field must have a value for Curriculum Planner to work. |
| EFA Bands | The banding levels calculated in the EFA funding methodology (read-only). |
| EFA Provided Retention Factor |
The EFA provided retention factor. This value is supplied by the EFA and must be obtained through them. This field must have a value for Curriculum Planner to work. |
| EFA Provided Weighting Multiplier |
The EFA provided weighting multiplier. This value is supplied by the EFA and must be obtained through them. This field must have a value for Curriculum Planner to work. |
| SFA Disadvantage Uplift % |
The SFA disadvantage uplift percentage. This value is supplied by the SFA and must be obtained through them. This field must have a value for Curriculum Planner to work. |
| SFA Co-Funding % |
The SFA co-funding percentage. This value is supplied by the SFA and must be obtained through them. This field must have a value for Curriculum Planner to work. |
| SFA Retention % (This Year) | The expected retention percentage for SFA learners this year for this course occurrence. A zero value in this field will cause there to be no SFA non-apprentice funding calculations. |
| SFA Achievement % (This Year) | The expected achievement percentage for SFA learners this year for this course occurrence. A zero value in this field will cause there to be no SFA non-apprentice funding calculations. |
| SFA Apprentice Retention % (This Year) | The expected retention percentage for SFA learners this year for this course occurrence. A zero value in this field will cause there to be no SFA non-apprentice funding calculations. |
| SFA Apprentice Achievement % (This Year) | The expected achievement percentage for SFA learners this year for this course occurrence. A zero value in this field will cause there to be no SFA non-apprentice funding calculations. |
| SFA On Programme Funding % | The percentage of funding the institution will receive over the course of the programme. This is split over the course of the year. |
| SFA Achievement Funding % | The percentage of funding the institution will receive at the end of the programme. |
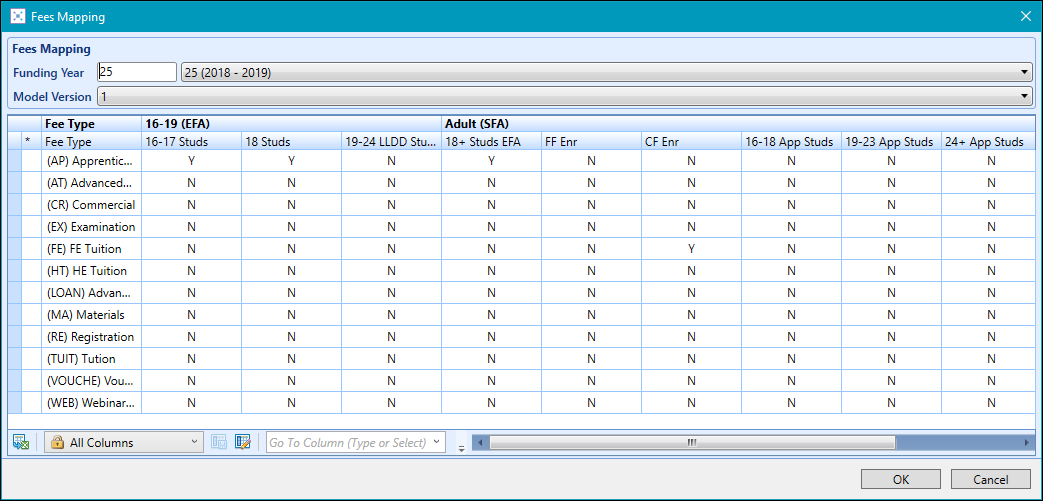
You can associate fees to the learner numbers associated with your plan on the Fees Mapping window.
To associate a fee with a specific funding stream:
-
Click the Fees Mapping button on the Curriculum Planner ribbon.

The Fees Mapping window is displayed, which contains a list of active fee types.
-
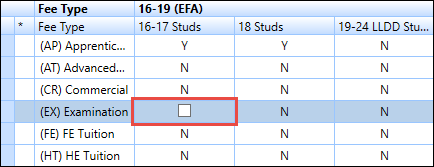
Select the appropriate funding stream you want to associate with your fee.
-
Select the check box to associate the fee to the funding stream.
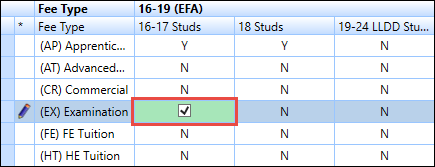
You can add further fees by repeating the same process. All links between fees and funding streams that have changed will have a green background on the field.
-
Click OK.
The changes are saved.
When you have created or opened your plan, you can start adding courses.
It is recommended to add no more than 250 courses within each plan. This is good practice in the efficiency of the curriculum planning process and to also ensure the optimum performance of the module.
To add a course to a plan:
-
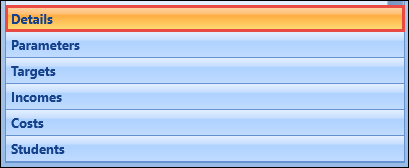
Click the Details tab at the bottom of the Plan pane.
-
Click the Add button on the Curriculum Planner ribbon.

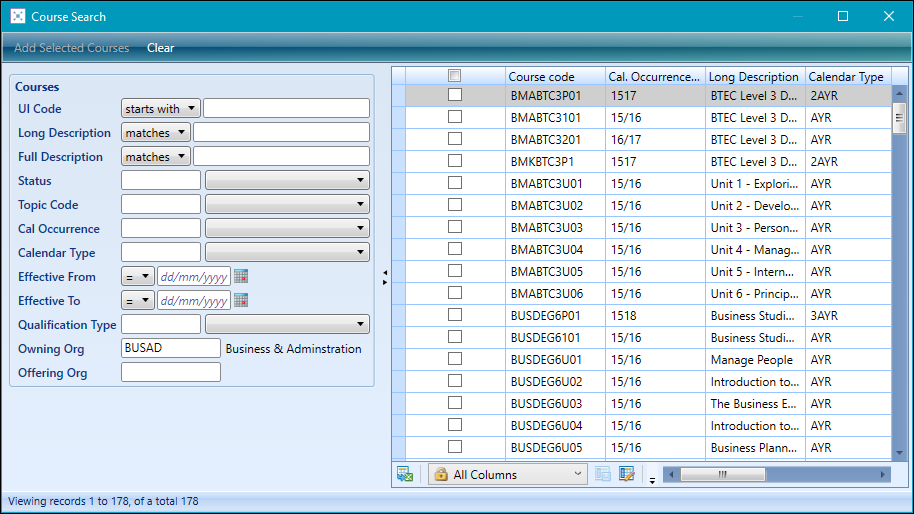
The Course Search window is displayed.
-
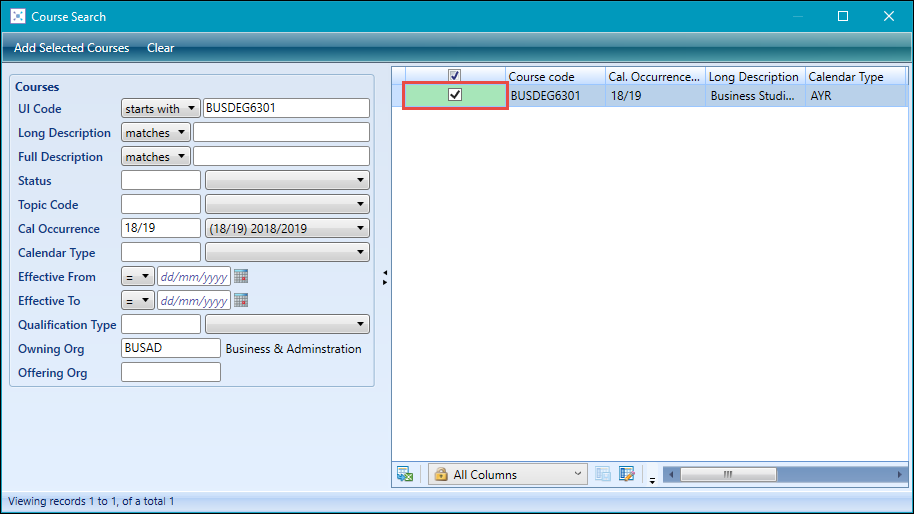
Search for the course(s) you want to add to a plan, and then select the check box for the required course(s).
You can add multiple courses at the same time by either selecting the courses you want to add or if you want to add all courses from the results of the search, you can click the top check box to select all courses from the search.
-
Click the Add Selected Course button at the top of the Course Search window.

When you have added a course to a plan, it is displayed as a new row in the grid on the Courses screen.
The initial columns on the left side of the grid are static and display information about the course. All other fields are dynamic and are dependent on the funding year and model version for the plan.
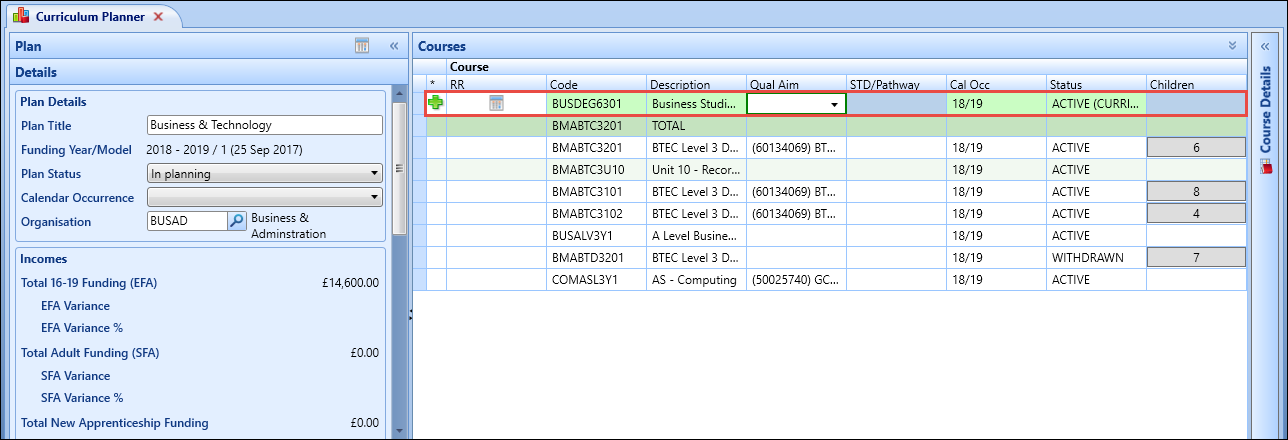
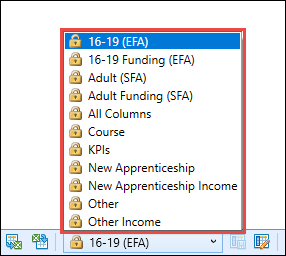
By default, all fields are displayed in the grid and are placed into different groups. It is possible to select a column configuration to only display specific groups.
-
When you have entered the required details, click Save.
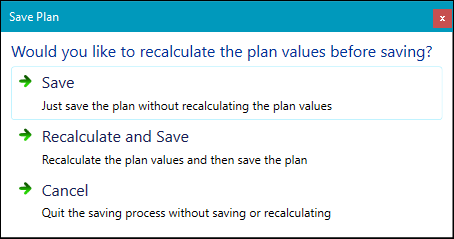
The Save Plan message is displayed.
- Click one of the following:
- Save - saves the plan without recalculating the plan values
- Recalculate and Save - recalculates the plan values and then saves the plan
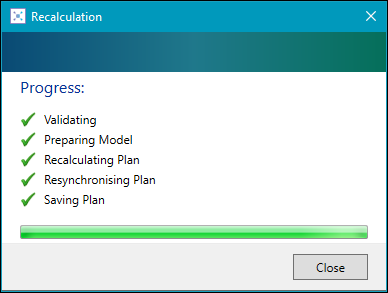
You can also click the Recalculate button on the Curriculum Planner ribbon after saving your course(s) to recalculate the plan values.
-
Click Close on the message if required.
The course is added to the plan.
You can add learning aims to a curriculum plan if a course has multiple learning aims associated with it so you can plan against different learning aims separately.
To add a learning aim to a plan:
-
Click the Details tab at the bottom of the Plan pane.

-
Select the course you want to add a learning aim from in the grid.

-
Click the triangle on the Add button on the Curriculum Planner ribbon, and then select the Add Funding Aim option.
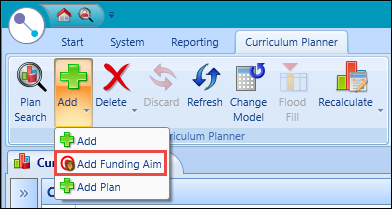
A new row is added to the grid for the selected course.

-
Select the aim you want to add from the drop-down list in the Qual Aim column.

-
Click Save.
The Save Plan message is displayed.

- Click one of the following:
- Save - saves the plan without recalculating the plan values
- Recalculate and Save - recalculates the plan values and then saves the plan
You can also click the Recalculate button on the Curriculum Planner ribbon after saving your course(s) to recalculate the plan values.

-
Click Close on the message if required.
The learning aim is added to the plan.
You can add child courses to plans so curriculum planners can work with the child UIOs as well. This enables you to:
- Add funding streams and aims to a child UIO
- Aggregate totals, including the parent UIO level in a 'TOTAL' row
If a course has child courses, a button will display in the Children column with the number of children associated with the course displayed on it.
To add a child course to a plan:
-
Click the button in the Children column for the required parent UIO.
A button is only displayed in the Children column if a course has child courses, with the number of children associated with the course displayed on it.

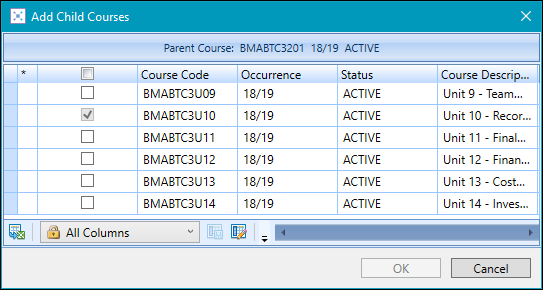
The Add Child Courses window is displayed.
-
Select the check box for the required child course(s).
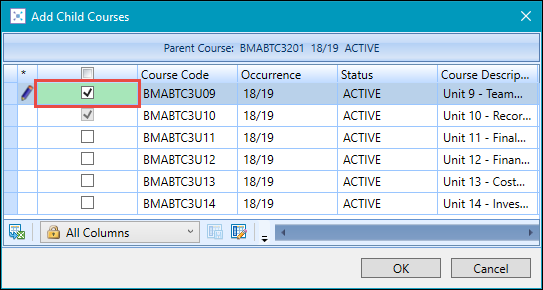
You can add multiple child courses at the same time by either selecting the courses you want to add or if you want to add all courses, you can click the top check box to select all courses from the search.
-
Click OK.
A new row is added to the grid for the selected course.

-
When you have entered the required details, click Save.
The Save Plan message is displayed.

- Click one of the following:
- Save - saves the plan without recalculating the plan values
- Recalculate and Save - recalculates the plan values and then saves the plan
You can also click the Recalculate button on the Curriculum Planner ribbon after saving your course(s) to recalculate the plan values.

-
Click Close on the message if required.
The child course is added to the plan under its parent and a TOTAL row displayed above the parent course.

You can add funding for roll on roll off courses to a plan. This functionality can only be used for child courses and is only available in the following fields:
- FF Enr
- CF Enr
- 16-18 App Studs
- 19-23 App Studs
- 24+ App Studs
To add a roll on roll off course to a plan:
-
Click in one of the fields listed above for a child course, and then click the Calendar button that is displayed.
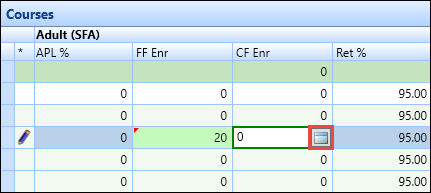
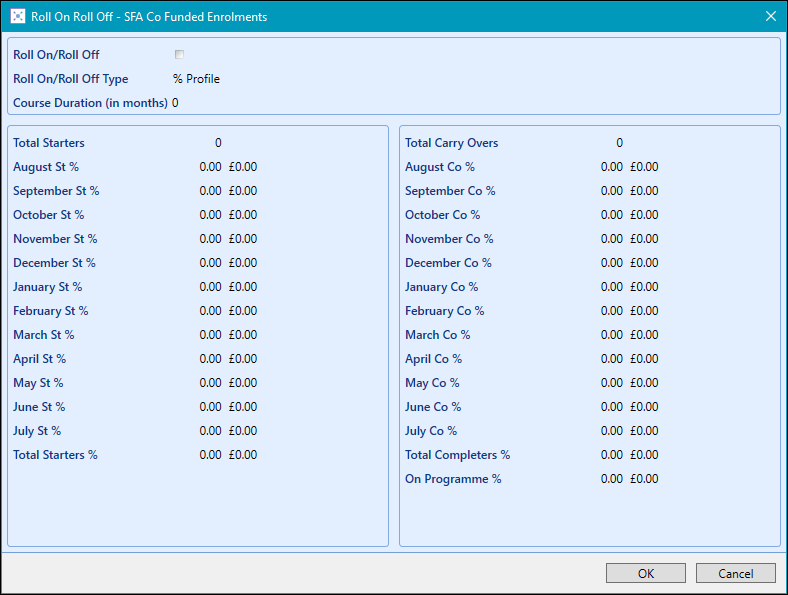
The Roll On Roll Off window is displayed.
-
Select the Roll On/Roll Off check box.
This will enable the other fields on the Roll On Roll Off window.
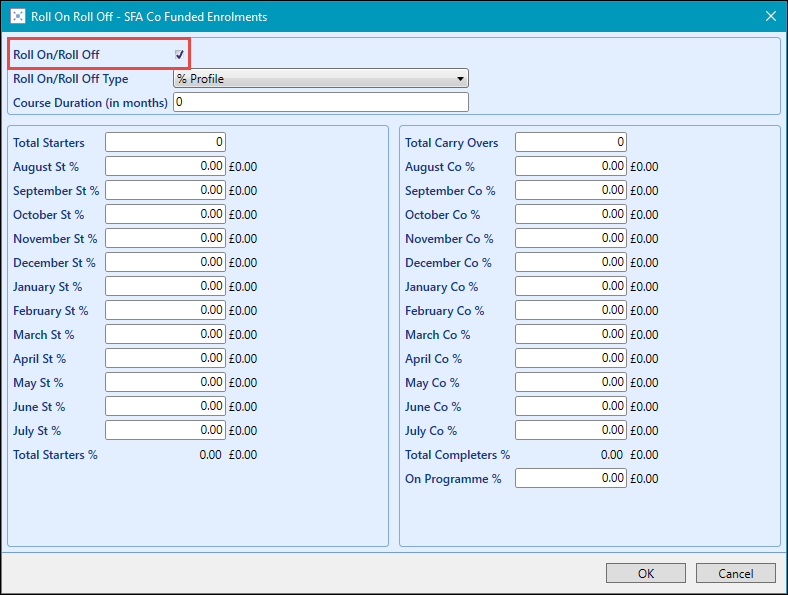
The fields on the Roll On Roll Off window are described in the following table.
| This field | Holds this information... |
|---|---|
| Roll On/Roll Off Type | The type of roll on roll off course. You can only select from '% Profile'. |
| Course Duration (in months) | The length (in months) the course lasts for. |
| Total Starters | The total amount of learners that will start the course. |
| August-July St % | The percentage of learners that will start the course for each month from August to July. |
| Total Starters % |
The total percentage of learners that will start the course (read-only). This updates as you enter values for each of the months. This value must be equal to 100 before you can save the changes. |
| Total Carry Overs | The total amount of learners that will carry over onto the course. |
| August-July Co % | The percentage of learners that will complete the course by each month from August to July. |
| Total Completers % |
The total percentage of completers (read-only). This updates as you enter values for each of the months. This value must be equal to 100 before you can save the changes. |
| On Programme % |
The total percentage of learners not completing the course in the year (that is: any learners that will carry over onto the course in the following year). This field can only have a value set if the Course Duration (in months) field is 14 or above. |
-
Click OK.
The Roll On Roll Off window is closed.
-
Click Save.
The Save Plan message is displayed.

- Click one of the following:
- Save - saves the plan without recalculating the plan values
- Recalculate and Save - recalculates the plan values and then saves the plan
You can also click the Recalculate button on the Curriculum Planner ribbon after saving your course(s) to recalculate the plan values.

-
Click Close on the message if required.
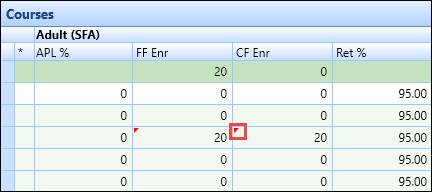
A red triangle displayed in the top left corner of the field to indicate that roll on roll off information is associated with these learners.
When you make amendments to your plan (for example: changing the amount of learners attending), you need to recalculate the plan for the related values to be changed to match the new data.
You can recalculate all courses that have been amended since the last save on a plan. These courses are highlighted in the plan by a calculator symbol.
![]()
To recalculate all amended courses on a curriculum plan:
-
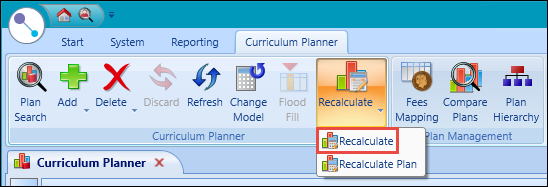
Click the triangle on the Recalculate button on the Curriculum Planner ribbon, and then select the Recalculate option.
The Recalculation message is displayed, which shows the progress of the recalculation.
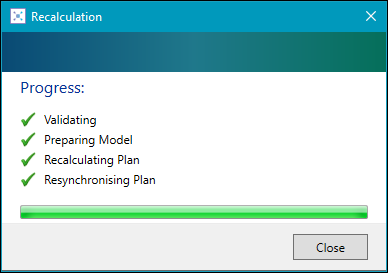
- Click Close on the message.
-
Click Save.
The amended courses on the curriculum plan are recalculated.
When you make amendments to your plan (for example: changing the amount of learners attending or changing the funding model), you need to recalculate the plan for the related values to be changed to match the new data.
You can recalculate an entire plan regardless of whether courses have been amended or not. This functionality will also take into account the costs and incomes attached to the plan as well.
To recalculate a curriculum plan:
-
Click the triangle on the Recalculate button on the Curriculum Planner ribbon, and then select the Recalculate Plan option.
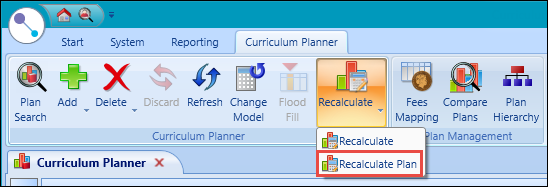
The Recalculation message is displayed, which shows the progress of the recalculation.

- Click Close on the message.
-
Click Save.
The curriculum plan is recalculated.
To delete a curriculum plan:
- Search for the required curriculum plan.
-
Click the triangle on the Delete button on the Curriculum Planner ribbon, and then select the Delete Plan option.
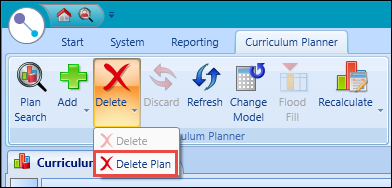
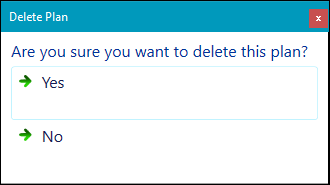
The Delete Plan message is displayed.
-
Click Yes to confirm the deletion.
The curriculum plan record is deleted.