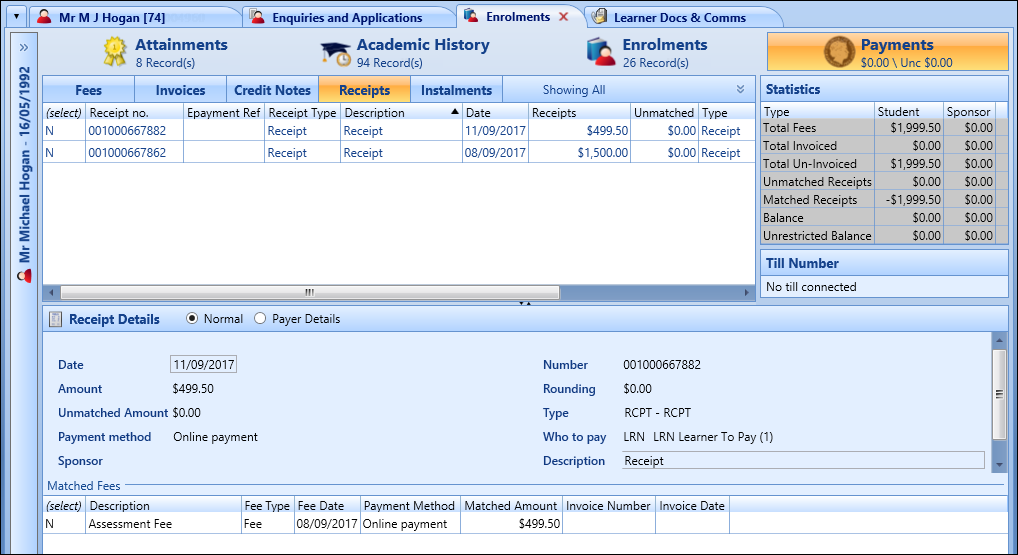
The Receipts tab is displayed automatically when you pay a fee or invoice. You can then create a receipt to match to the fee so that you can track the associated payments.
From the Receipts tab, you can:
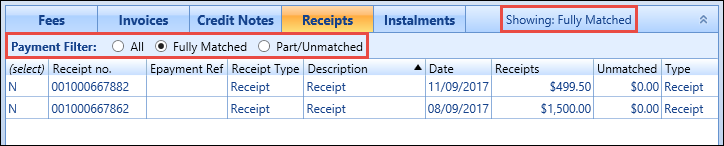
You can filter the receipts to view all receipts, those that have been matched, and those that are unmatched.
Select the Expand button in the top right of the Receipts grid to show the Payment Filter options.

You can then select a receipts filter option, which updates the records displayed and the indicator at the top of the Receipts grid.
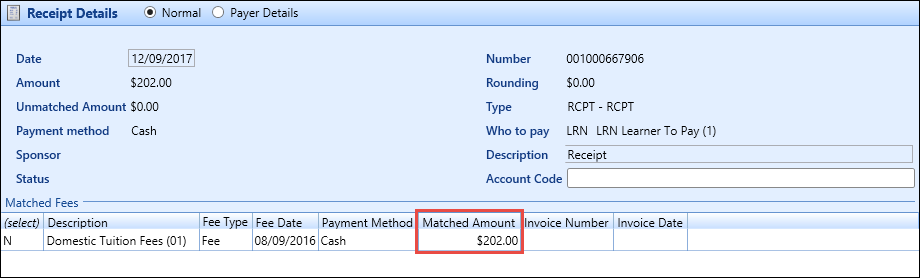
Select a receipt in the Receipts grid to view the details in the Receipt Details section.
A receipt is created automatically when you select to pay a fee or an invoice, and displayed in the Receipt Details section.
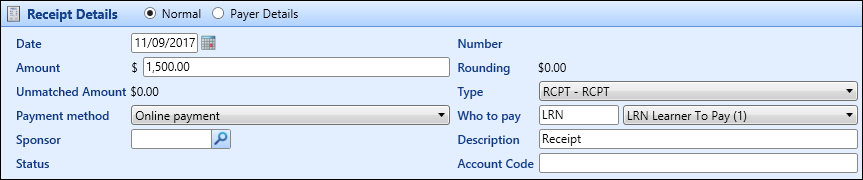
The fields in the Receipt Details section are described in the following table.
| This field | Holds this information... |
|---|---|
| Date | The date the receipt was created. Defaults to the current system date. To change the date, select the Calendar button to display the calendar, where you can select the required date. |
| Number | The receipt number (read-only). |
| Amount | The amount required to pay. This is automatically populated from the details entered for the fee. |
| Unmatched Amount | The unmatched amount (read-only). |
| Type | The receipt type. Select from the drop-down list. |
| Payment Method | The payment method. Select from the drop-down list. |
| Who to Pay | The person/company/institution responsible for paying the fee. This is automatically populated from the details entered for the fee. |
| Sponsor | If you selected a sponsor value in the Who To Pay field, enter the required sponsor code. Alternatively, select the Search button to display the Sponsor Search window, where you can select the required code. |
| Description | The description for the fee. |
| Status | The receipt status. |
| Account Code | The account code. |
When you have completed the required fields, select Save to save the receipt.
If you have not entered the required payer details for the receipt, a message similar to the following will display when you save the receipt.
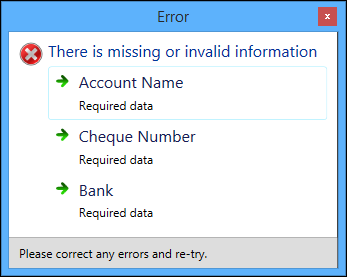
You must add payer details to receipts for certain payment methods. The payer details will differ according to the payment method selected. Payer details are saved to the FEES_LIST_SPECIAL table.
Select the Payer Details option to complete the relevant details for the selected payment method.

The payer details displayed depend on the which of the following payment types are selected:
-
Cheque payments - these payer details are mandatory

-
Credit card payments - these payer details are mandatory

-
Direct credit payments - these payer details are mandatory

-
ePayments and online payments - these payer details are optional

-
Internal order payments - these payer details are mandatory

You can match fees to receipts so that you can track the payments that are associated with specific receipts.
To match fees to a receipt:
-
Select in the (select) column of the required receipt to turn the N to Y .

-
Select in the (select) column for the required fee, to turn the N to Y .
Important.You can also select the Instalments option at the top of the Unmatched grid to match instalment fees.
-
In the Matched column, enter the amount to match against the fee.

-
Select Save to confirm the changes.
The matched fees are displayed in the Receipt Details section.
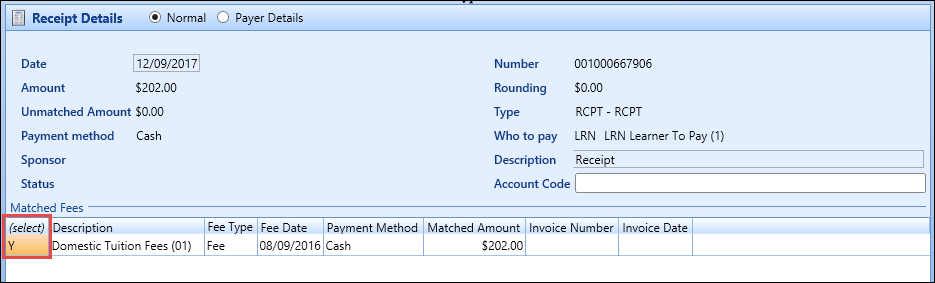
To unmatch a fee that has previously been matched:
-
Select in the (select) column of the required receipt, to turn the N to Y .

-
Select in the (select) column of the required fee, to turn the N to Y .
-
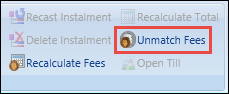
Select the Unmatch Fees button on the Payments ribbon.
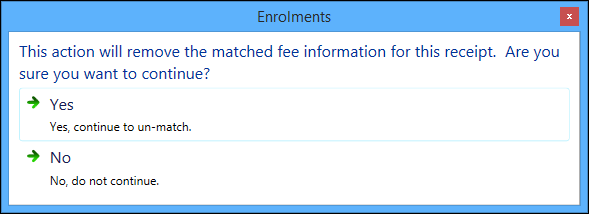
The following message is displayed.
-
Select Yes to unmatch the fee and the receipt.
The fee is unmatched.
The Unmatched Receipts and Matched Receipts fields in the Statistics section will automatically update to reflect the changes made.
 Important.When all the matched receipts against an enrolment are unmatched, you can make any necessary changes to the fee (that is: changing waivers).
If it has been agreed that a debt can be written off, this can be done by creating a receipt for the outstanding debt and using a different receipt type for the payment. You can select a Write Off payment method for this purpose.
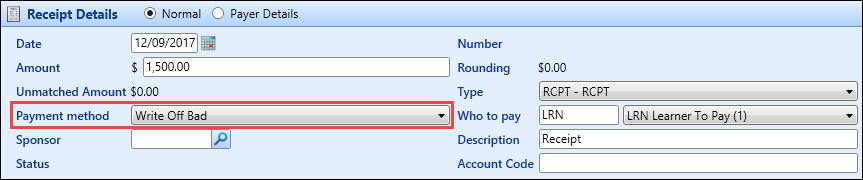
The following payer details are mandatory for write off payment methods.
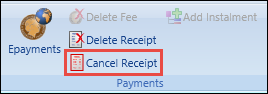
To cancel a receipt:
-
Select in the (select) column of the required receipt to turn the N to Y .

-
Select the Cancel Receipt button on the Payments ribbon.
The Cancel Receipt window is displayed.
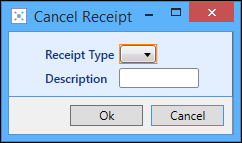
- Select a receipt type from the drop-down list, and enter a description.
- Select OK .
-
Select Save .
The receipt is cancelled, and the receipt record displayed in the Receipts grid with the status of ‘Cancelled Receipt’.

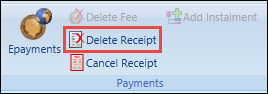
To delete a receipt:
-
Select in the (select) column of the required receipt to turn the N to Y .
-
Select the Delete Receipt button on the Payments ribbon.
A message is displayed.
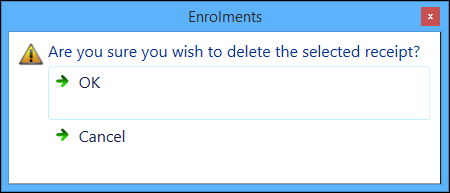
-
Select OK to confirm you want to delete the receipt.
The receipt is deleted.
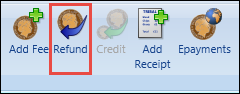
To refund a receipt:
-
Select in the (select) column of the required receipt to turn the N to Y .
Important.You can only refund one receipt at a time.
-
Select the Refund Receipt button on the Payments ribbon.
The Enrolments Refund window is displayed.
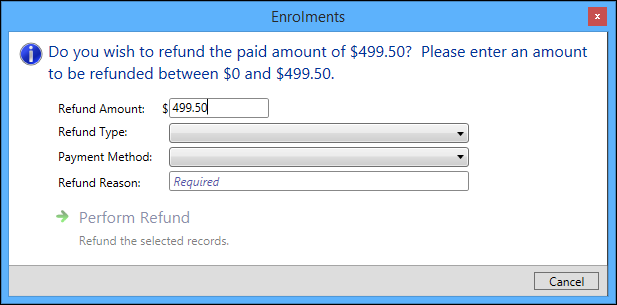
- Enter the required details in the available fields.
The fields on the Enrolments Refund window are described in the following table.
| This field | Holds this information... |
|---|---|
| Receipt Amount |
The amount required to pay. This is automatically populated from the details entered for the fee. Important.This field does not accept non-numeric characters (that is: if you try to enter an invalid character such as the negative symbol, it will not display in the field).
|
| Refund Type | The refund type. Select from the drop-down list. |
| Payment Method | The payment method. Select from the drop-down list. |
| Refund Reason | The reason for the refund. |
-
Select the Perform Refund button to confirm the changes.
The Receipt Details section is changed to Refund Details and displays the information entered on the Enrolments Refund window.
Important.The Who to Pay field defaults to who made the original payment (person or sponsor). If the original payment was made by a sponsor, you must select a valid organisation code in the Sponsor field.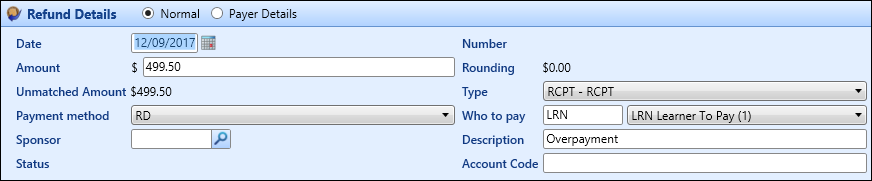
-
Select Save to confirm the changes.
The receipt is refunded, and the receipt record displayed in the Receipts grid with the status of ‘Refund’.

To print a receipt:
-
Select in the (select) column of the required receipt to turn the N to Y .
Important.You can only print one receipt at a time.
-
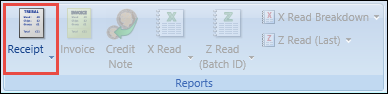
Select the Receipt button in the Reports group of the Payments ribbon.
The receipt is automatically sent to your default system printer.