You can use the grid toolbar in Central to manage and configure grids in the system and easily export useful and shareable data straight from the grid screens.
The grid toolbar can be found in the bottom left-hand corner of the screen.

When the screen size is reduced, the options in the grid toolbar can be selected from the drop-down.

Use the grid toolbar to:
Use the Export Grid Data function to save the data results from the condition builder to the following formats:
- .xls (limited to 65000 rows)
- .xlsx
- .csv
To export grid data:
-
Use the condition builder to filter the data you want to export.
-
Click the Export Grid Data button in the grid toolbar section of the screen.
You can also export grid data by right-clicking in the grid and selecting the Export Data option.

The Export Settings window is displayed.
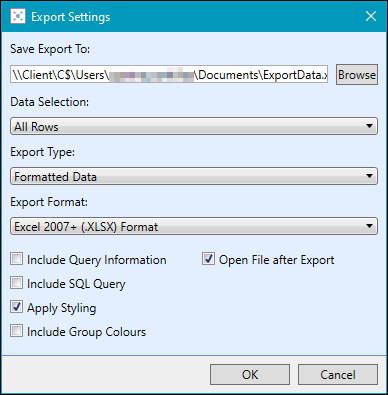
- Enter the relevant export details.
The fields on the Export Settings window are described in the following table.
| This field | Holds this information... |
|---|---|
| Save Export To |
The file path that the export file should be saved to. Click the Browse button to browse to the required file path. |
| Data Selection | The data that is exported from the grid. Select All Rows or Selected. |
| Export Type |
The export type. Select from the following:
|
| Export Format |
The export format. Select from the following:
|
| Include Query Information |
Whether to include query information on the export. You must have the Show export query information role to access this check box. |
| Include SQL Query |
Whether to include the sql query information on the export. You must have the Show export query information role to access this check box. |
| Apply Styling |
Whether styling is required on the export. The styling applied will be depend on the Export institution settings. |
| Include Group Colours |
Whether group colours are required on the export. The Include Group Colours check box is not available for selection if there are no colour groups defined in the grid. |
| Open File after Export | Whether to open the file automatically after it has been exported. |
-
Click the OK button to save the export, or Cancel to cancel the export.
The Export Status window is displayed.
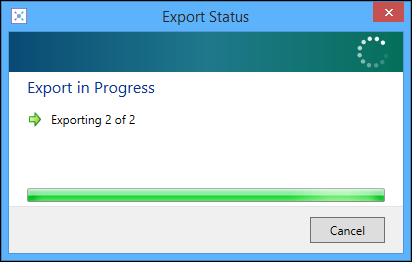
If required, you can click the Cancel button to cancel the process.
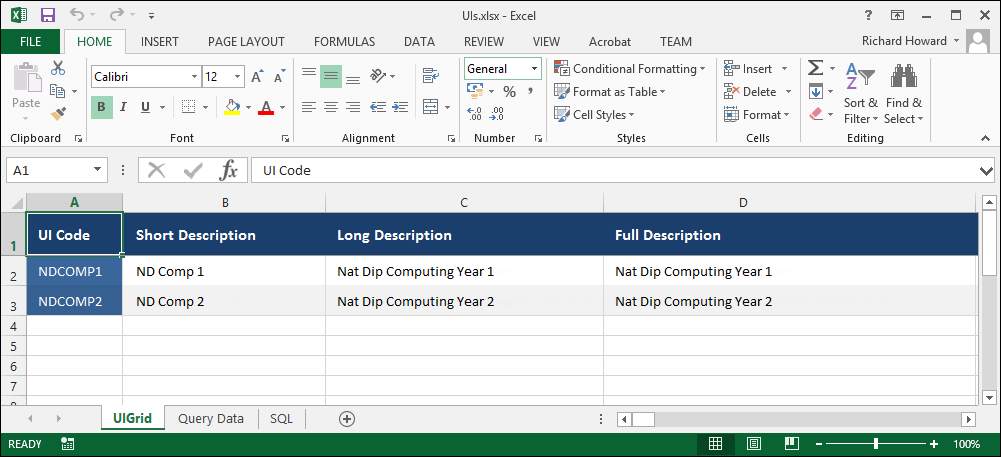
The data is exported to the selected file location and displayed in the selected format.
Use the Manage Grid Configurations functionality to restrict the columns displayed in the grid, for example: to show only those required for a particular editing requirement. A number of built-in configurations are provided (with a padlock icon displayed beside them), which can be selected from the grid configurations drop-down list in the grid toolbar.

When you change a stored configuration (for example: the column width, visibility, column order and so on), a new grid configuration is automatically created and named Custom. Ongoing configuration changes will apply to the selected grid configuration only. If a custom configuration already exists, this will be overwritten with the new version so it is recommended to save any configurations you will need to use again.
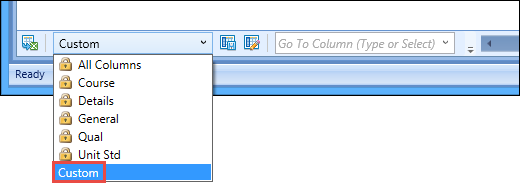
You can save any grid configuration for re-use (for example: changing a stored configuration creates a new configuration automatically named Custom which can be saved for use again). To do this, ensure that the set of columns currently displayed are the required set of columns (from the column header options), and then click the Save Grid Configuration button in the grid toolbar.

The Save Grid Configuration window is displayed.
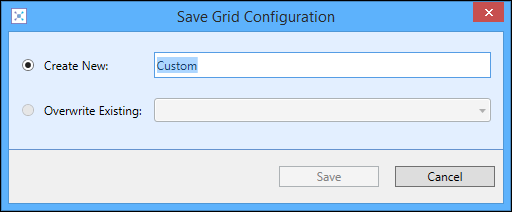
Do one of the following:
- Select Create New, enter a name for the new configuration, and then click Save
- Select Overwrite Existing, select the configuration you want to overwrite from the drop-down list, and then click Save
The grid configuration is saved and will be available for selection in the list of stored configurations.
To create your own grid configuration:
-
Click the Manage Grid Configurations button in the grid toolbar.

The Manage Grid Configurations window is displayed.
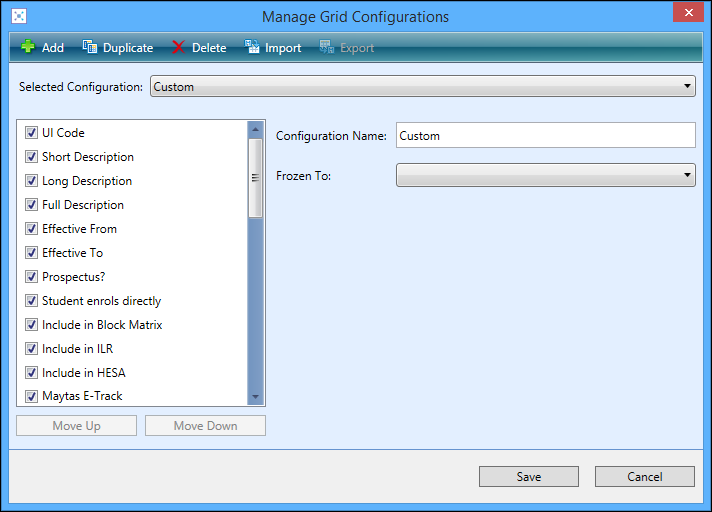
-
Click the Add button.

You can also duplicate a grid configuration and edit it to your requirements by selecting a configuration from the Selected Configuration field and clicking the Duplicate button.

-
In the left-hand pane, select/deselect the check boxes beside the required columns to display.
You can select multiple columns using Shift-click (for a series of columns), Ctrl-click (for individual columns), or Ctrl+A (for all columns). You can also drag and drop a column or select a column and click the Move Up or Move Down buttons to change the column order. You can only move columns if it is permitted for the selected grid.
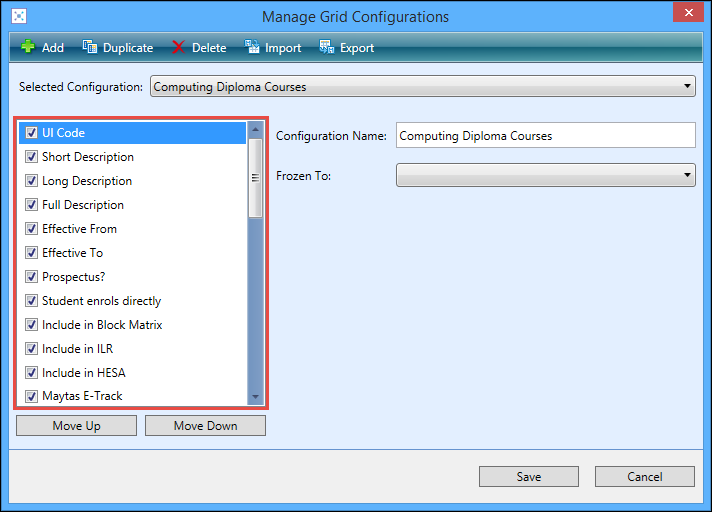
- In the Configuration Name field, enter a name for the new grid configuration.
- If required, in the Frozen To field, select a column to freeze the selected column and columns before it to the left of the screen from the drop-down list.
-
Click Save.
The grid configuration is added and will be available for selection in the list of stored configurations.
When you close the module, these configurations are stored and the next time the dataset is selected, the last used configuration is chosen automatically. The configurations are stored against your username in the database, so that they are accessible regardless of which machine the user logs in from.
To delete a grid configuration that has previously been created:
-
Click the Manage Grid Configurations button in the grid toolbar.
Built-in configurations (that is: All Columns) are protected from deletion.

-
On the Manage Grid Configurations window that is displayed, select the required grid configuration from the Selected Configurations field, and then click the Delete button.

The Confirm Configuration Deletion message is displayed.
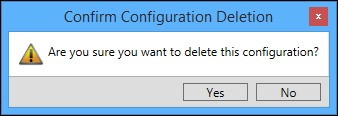
- Click Yes.
-
Click Save.
The grid configuration is deleted and removed from the list of stored configurations.
You can export your own grid configurations (for example: standard configurations that can be imported by other users) on the Manage Grid Configurations window.
To export a grid configuration:
-
Click the Manage Grid Configurations button in the grid toolbar.

-
On the Manage Grid Configurations window that is displayed, click the Export button.

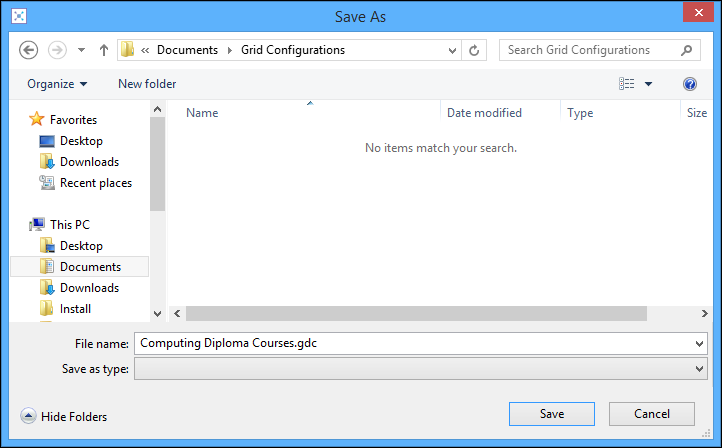
The Save As window is displayed.
-
Navigate to the required location to store the file, and click Save.
The grid configuration is exported in .gdc format by default.
The Grid Configuration Exported Successfully message is displayed.
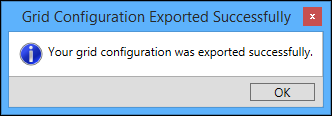
- Click OK.
-
Click Save.
The grid configuration is exported to the selected file location.
You can import grid configurations (for example: standard configurations created by other users) on the Manager Grid Configurations window.
To import a grid configuration:
-
Click the Manage Grid Configurations button in the grid toolbar.

-
On the Manage Grid Configurations window that is displayed, click the Import button.

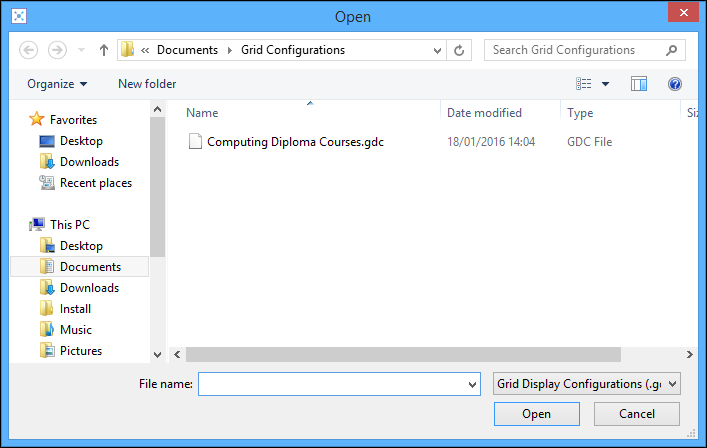
The Open window is displayed.
-
Navigate to and select the required grid configuration to import, and click Open.
The Grid Configuration Imported Successfully message is displayed.

- Click OK.
-
Click Save.
The grid configuration is imported and will be available for selection in the list of stored configurations.
You can navigate to a specific column in the grid from the Go To Column field in the grid toolbar.

To navigate to a column from the Go To Column field, do one of the following:
-
Enter the name of the column (as you type available columns which match the text are displayed), and press Enter

-
Select the required column from the drop-down list
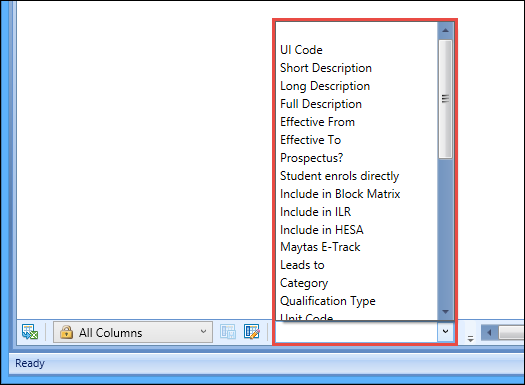
You can also navigate to a column by right-clicking a column header and selecting a column from the Scroll to Column option.