To take a photograph of a learner, you will need a webcam attached to a PC. The learner module supports ‘plug and play’ cameras (depending on whether Windows recognises the camera in this way).
The photograph control is on the right-hand side of the Learner Details screen.
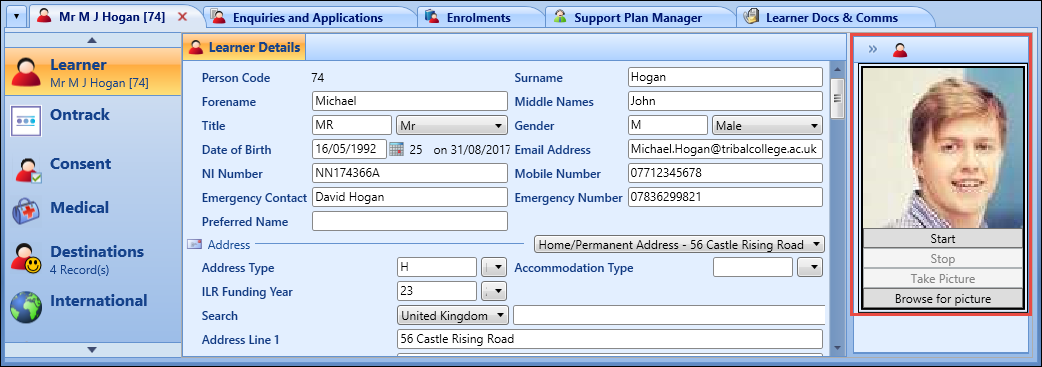
From the photograph control, you can:
To take a learner photograph:
-
Select the Start button in the photograph control.
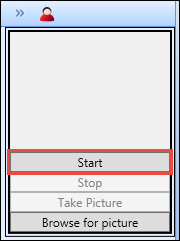
The image will reflect the view that the webcam is currently capturing.
-
Select the Take Picture button when the image is ready to be captured.
The image is now static in the photograph control.
-
Select the Stop button to stop the webcam.
The image is displayed in the photograph control.
-
Select Save .
The image is saved to the database.
You can import a photograph that has previously been taken (for example: with a digital camera) and that exists on a local or network drive accessible from the PC.
To import a learner photograph:
-
Select the Browse for picture button below the photograph control.
Important.The Allow users to browse for photos (Enrolment Client) setting must be set to 'Y' in Enrolments institution settings for this button to be enabled.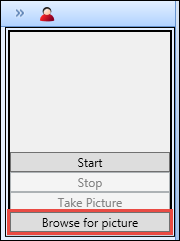
The Open window is displayed.
-
Navigate to and select the required image.
Important.The image file must be in .jpg format.The image is displayed in the photograph control.
Important.The learner module does not allow the modification of images imported in this way. -
Select Save .
The image is saved to the database.
You can also import learner photographs in bulk (for example: from a CD or local directory) on the Imports screen providing the photo names include the learner's ID.
To access the Imports screen, select the Imports button on the System ribbon.
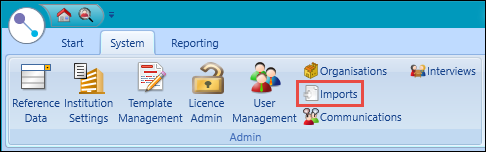
This will display the Imports screen.

From the Imports screen, you can use the Import Learner Images wizard to import learner photographs in bulk:
To display the Import Learner Images wizard, select the Import Learner Images button on the Admin Commands ribbon.

The Import Learner Images wizard is displayed.
The Step 1 of 3 - Select a folder containing images screen is the initial screen displayed.
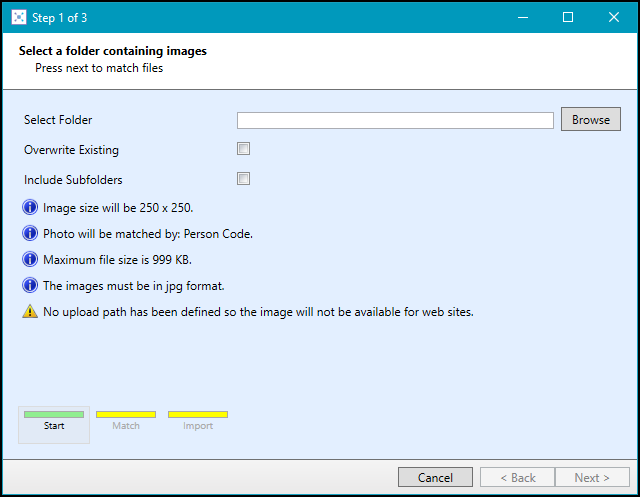
The fields on the Step 1 of 3 - Select a folder containing images screen are described in the following table.
| This field | Holds this information... |
|---|---|
| Select Folder | You must select a folder containing learner photos to import. Select the Browse button to display the Browse For Folder window, where you can select the required folder. |
| Overwrite Existing | Whether to overwrite existing learner photos. |
| Include Subfolders | Whether to include photos stored in sub-folders. |
Select the Next button to display Step 2 of 3 of the Import Learner Photos wizard.
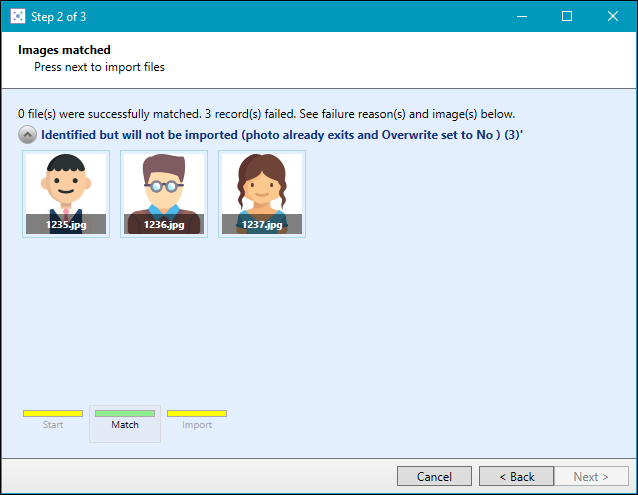
The Step 2 of 3 - Images matched screen displays the number of image files that were matched successfully with learner records in EBS.
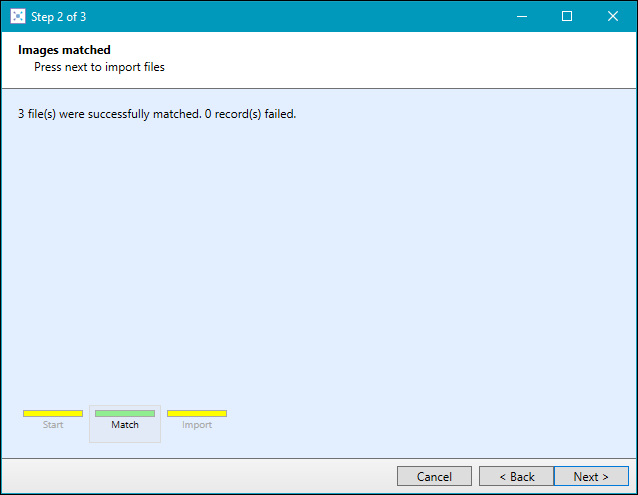
Select the Next button to display Step 3 of 3 of the Import Learner Photos wizard.
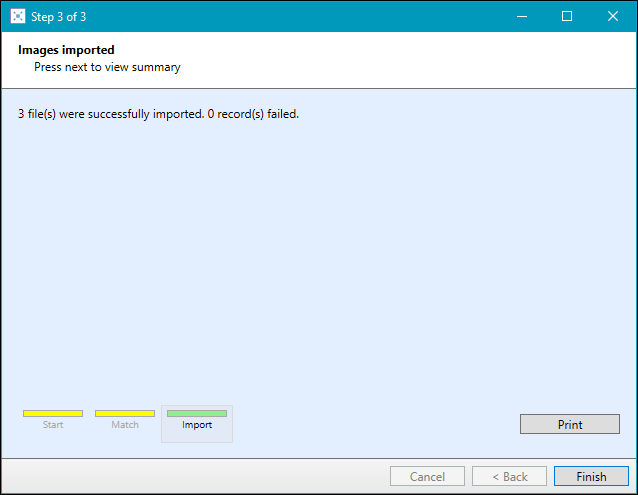
The Step 3 of 3 - Images imported screen displays the number of image files that were imported successfully into EBS and any errors from the previous screen if applicable.
Select the Finish button to close the Import Learner Photos wizard.