If no records are found using the search, you can create new organisation records.
From the Organisation Management screen, you can:
-
Click the Add Organisation button on the Organisation Search window.
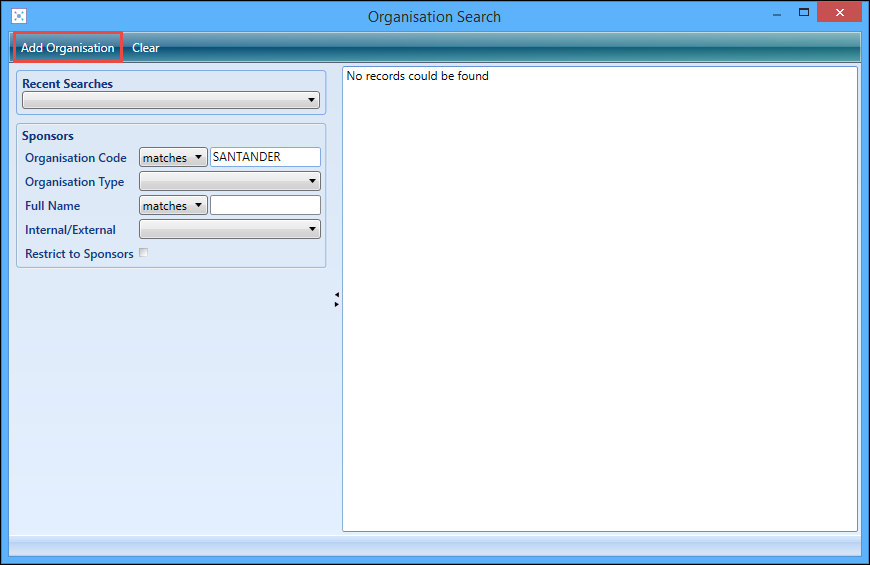
The Organisation Management screen is displayed. Any fields populated when searching are displayed in the Organisation Details section.
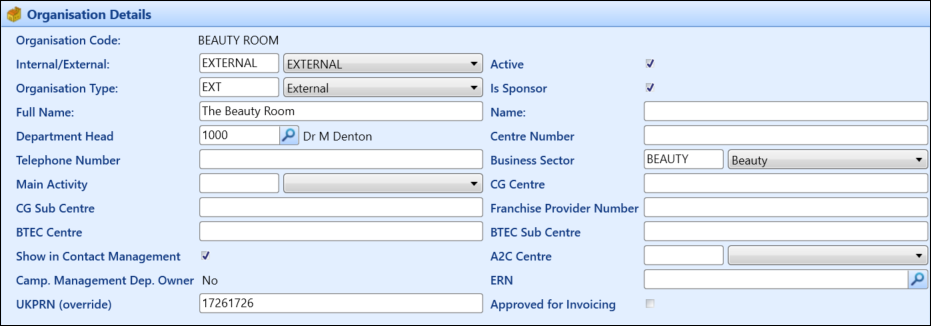
- Enter the details for the organisation in the Organisation Details section.
The fields in the Organisation Details section are described in the following table.
| This field | Holds this information... |
|---|---|
| Organisation Code | The organisation code. This code needs to be unique (required). |
| Internal/External | Select whether an organisation is internal or external to the institution (required). |
| Active | Select the check box to specify that this is an active record. |
| Organisation Type | The organisation type. The options available in the drop-down list are populated from the Organisation Unit Types reference data (required). |
| Is Sponsor | Select the check box to specify that the organisation is a sponsor. A sponsor organisation supports learners by contributing to the payment of fees. |
| Full Name | The full name of the organisation. |
| Name | The short name of the organisation. |
| Department Head |
The department head is the name of the individual who manages the department in this organisation. Click the Search button to display the Staff Search window, where you can select the required staff member. Populating this field will add a record to the Staff tab. |
| Centre Number | This field is not applicable. |
| Telephone Number | The organisation’s contact telephone number. |
| Business Sector | The area of business in which the organisation operates. The options available in the drop-down list are populated from the Business Sectors reference data. |
| Main Activity | The products/services the organisation provides to customers. The options available in the drop-down list are populated from the Business Activities reference data. |
| Franchise Provider Number | The collaborative provision partner code. |
| Show in Contact Management | Whether the organisation can be selected in Contact Management. |
| Camp. Management Dep. Owner |
Whether the organisation can be selected as the owning organisation in Campaign Management (that is: the departmental owner of the campaign). The Camp. Management Dep. Owner option is only available for internal organisations. |
| UK CG Centre | The CGLI centre code. |
| UK CG Sub Centre | The CGLI sub centre number. |
| UK BTEC Centre | The BTEC centre code. |
| UK BTEC Sub Centre | The BTEC sub centre code. |
| UK ERN |
The Employer Reference Number (ERN) of the organisation. This field can contain alpha, numeric and non-alpha numeric characters and has a maximum length of nine characters. A Search button is also available in the ERN field for external organisations only, from which you can search for and enter the ERN.
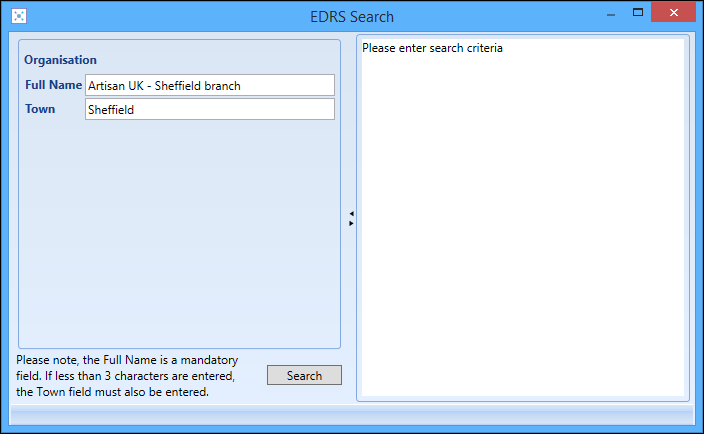
Clicking the Search button will display the EDRS Search window.
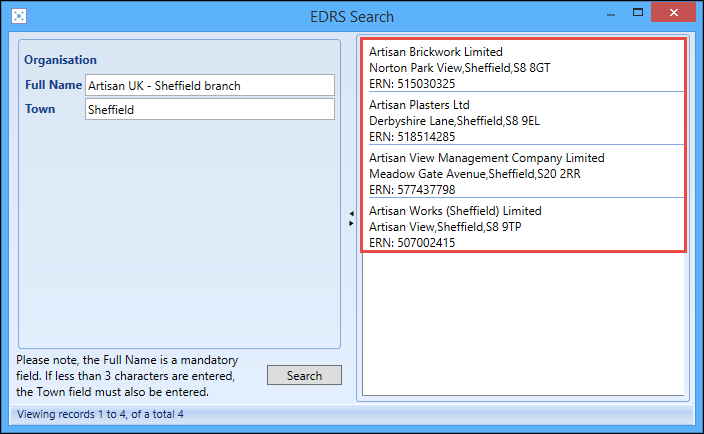
The Full Name and Town fields are automatically populated from the organisation record but can be amended if required. The Full Name field is mandatory, and can be used to search without entering the town as well but this will increase the length of time to return the results. If the full name of the organisation is three characters or less, the Town field will be mandatory and the Search button disabled until the town is entered. Click the Search button in the ERN field to search for and enter the ERN against the organisation record. This will trigger a query to the EDRS web service, with the results displayed in the right-hand pane of the EDRS Search window.
You can select the required ERN from the search results, which will automatically close the EDRS Search window and update the ERN field with the selected value. The following validation is also applied on performing a search on the EDRS Search window:
|
| UK UKPRN (override) | The UK Provider Reference Number (UKPRN) to record against an organisation to use as an override on the default UKPRN set in the UK Provider Number institution setting on the General (Cross-System) screen. |
| UKApproved for Invoicing | Whether the organisation has been approved for invoicing for block booking purposes. |
| WAL SMECode | An indicator of status of employer (that is: public, private or third sector Small and Medium Enterprise (SME) or non-SME), as confirmed in the relevant signed SME4 form. |
| WAL Employer Size | The number of staff employed by the employer. |
| WAL SICCode | The Standard Industrial Classification code of the employer. |
| WAL Apprentice Levy | The Apprentice Levy Indicator (LP82). |
Before you can save your new organisation you must enter the address details of the organisation in the Addresses section. The organisation’s address can be entered manually, or by using postcode look-up software, if installed. An organisation can have multiple addresses with different address types.
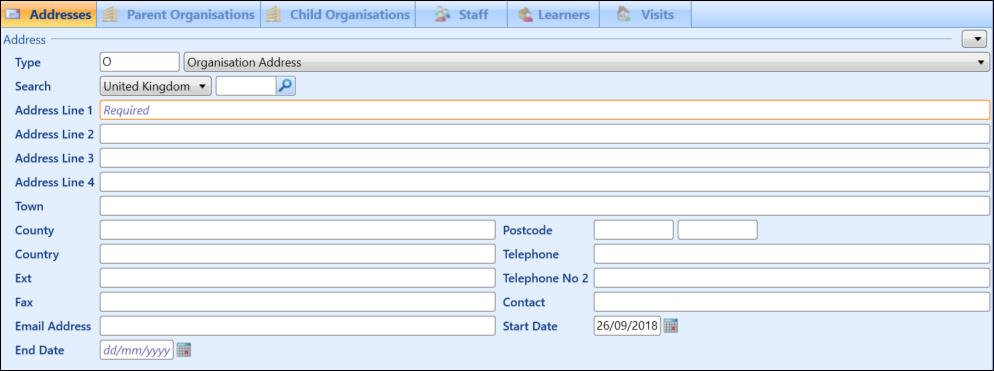
The fields in the Addresses section are described in the following table.
| This field | Holds this information... |
|---|---|
| Type | The address type. The options available in the drop-down list are populated from the Address Types reference data. |
| Postcode | Used to record the postcode, or when using the postcode look-up software. |
| Address Line 1 | Enter the first line of the address (required). Click the Search button to invoke the postcode look-up software. |
| Address Line 2 | The second line of the address where appropriate. |
| Address Line 3 | The third line of the address where appropriate. |
| Address Line 4 | The fourth line of the address where appropriate. |
| County | The county where the organisation’s office is located. |
| Country | The country where the organisation’s office is located. |
| Telephone | The primary telephone number for the organisation. |
| Ext. | Extension number for a particular individual associated with the address. |
| Telephone No. 2 | The secondary telephone number. |
| Fax | The fax number for this address. |
| Contact | The contact name for this address. |
| Email Address |
The email address for this particular address. If AFD is used as the postcode look-up software and the Email Validation institution setting on the AFD page is set to 'Manual Search', you can click the Validate Email button on the Admin Commands ribbon to run the email validation.
|
| Start Date | The start date of this address for this organisation. Click the Calendar button to display the calendar where you can select the required date. |
| End Date | The end date of this address for this organisation. Click the Calendar button to display the calendar where you can select the required date. |
| UK Town | The town where the organisation’s office is located. |
| NZ City | The city where the organisation’s office is located. |
When you have entered the address details, click Save to save the new organisation record.
Use the Parent Organisations and Child Organisations sections to create a hierarchy of relationships between organisations. Each organisation record can have multiple parent and child relationships with other organisations.
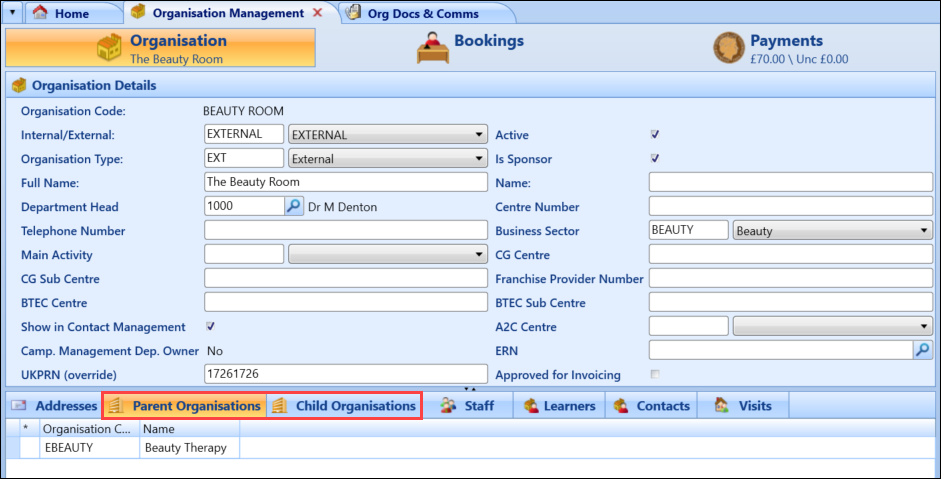
To add a parent or child organisation:
- Click the Parent Organisations or Child Organisations tab as required.
-
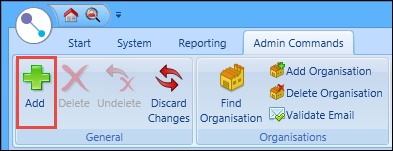
Click the Add button on the Admin Commands ribbon.
A row is added to the section you are currently in.

-
Enter the organisation code or click the Search button to display the Organisation Search window, where you can select the required organisation.

-
Click Save.
The parent or child organisation record is added.
Use the Staff section of the Organisation Management screen to enter staff records associated with the organisation.

To add a member of staff:
- Click the Staff tab.
-
Click the Add button on the Admin Commands ribbon.

A row is added to the Staff section.

-
Enter the details for the staff member.
The fields in the Staff section are described in the following table.
| This field | Holds this information... |
|---|---|
| Person Code | The person code of the staff member. Enter the person code or click the Search button to display the Staff Search window, where you can select the required staff member. |
| Staff Member | The staff member’s name. |
| Type |
The staff type. Select from the list of staff roles:
Only a single member of staff attached to an organisation can have a type of Department Head. If you attempt to add another record with this type, it will over-write the staff record originally assigned. |
| Start Date | The start date for the member of staff with this organisation. This defaults to the current date. To change the date, click the Calendar button to display the calendar where you can select the required date. |
| Created Date | The date the staff record with this organisation was created. |
| End Date | The end date for the member of staff with this organisation. Click the Calendar button to display the calendar where you can select the required date. |
| Primary Contact | Select Y to specify that the member of staff is the primary contact with this organisation. |
| Position | The position the staff member has in the organisation. The options available in the drop-down list are populated from the Position reference data. |
-
Click Save.
The staff member record is added.
Use the Learners section of the Organisation Management screen to record relationships between learners and an organisation.

You need the Full Organisations role to add learner records.
The grid only displays records where the relationship type is Employee or Placement. Existing staff records are not displayed in the grid, although a record can be created for an existing member of staff that has a relationship type of Employee or Placement.
A learner can have more than one employee or placement record, and these records can have overlapping start and end date ranges. They can also overlap with Staff-type records (for example: a learner may be both a staff member and a learner within an organisation).
To add a learner:
- Click the Learners tab.
-
Click the Add button on the Admin Commands ribbon.

A row is added to the Learners section.

- Enter the details for the learner.
The fields in the Learners section are described in the following table.
| This field | Holds this information... |
|---|---|
| Person Code | The person code of the learner. Enter the person code or click the Search button to display the Learner Search window, where you can select the required learner. |
| Title | The learner's title (for example: Mr). |
| Forename | The learner's forename. |
| Surname | The learner's surname. |
| Gender | The learner's gender. |
| Relationship Type | Whether the learner is an employee or on a placement. |
| Start Date |
The employment or placement start date. This defaults to today's date. |
| End Date | The employment or placement end date. |
| Include In Data Return | Whether to include the record in the data return. |
| Organisation Confirmed | The date that the organisation confirmed the employment or work placement. |
| UI Code |
The link between an employment or work placement record and a specific course enrolment. If the enrolment date range and the employment/work placement date range do not overlap, the cell is highlighted in yellow and a tooltip is displayed when hovering the cursor over the cell to warn you but you can still save the record. |
| Occurrence |
The occurrence that corresponds to the UI code. This field is populated automatically when the UI Code is selected. |
-
Click Save.
The learner record is added.
Use the Contacts section of the Organisation Management screen to add new contacts to an external organisation.

To add a contact to an external organisation:
- Click the Contacts tab.
-
Click the Add button on the Admin Commands ribbon.

A row is added to the Contacts section.

- Enter the details for the contact.
The fields in the Contacts section are described in the following table.
| This field | Holds this information... |
|---|---|
| Person Code | The person code of the contact. Enter the person code or click the Search button to display the Contact Search window, where you can select the required contact. |
| Title | The contact’s title. |
| Surname | The contact’s surname. |
| Forename | The contact’s forename. |
| Mobile Phone Number | The contact’s mobile phone number. |
| Start Date | The start date for the contact with this organisation. This defaults to the current date. To change the date, click the Calendar button to display the calendar where you can select the required date. |
| End Date | The end date for the contact with this organisation. Click the Calendar button to display the calendar where you can select the required date. |
| Primary Contact | Whether the contact is the primary contact with this organisation. |
| Position | The position the contact has in the organisation. |
| UK Job Title | The contact's job title. |
| UK Email Address | The contact's email address. |
| NZ Middle Names | The contact’s middle names. |
| NZ Date of Birth | The contact’s date of birth. To change the date, click the Calendar button to display the calendar where you can select the required date. |
| NZ Sex | The sex of the contact. |
-
Click Save.
The contact record is added.
Use the Visits section of the Organisation Management screen to enter details of visits with the organisation (for example: inspection visits to be made to accommodation providers).

To add a visit:
- Click the Visits tab.
-
Click the Add button on the Admin Commands ribbon.

A row is added to the Visits section.

-
Enter the details for the visit.
The fields in the Visits section are described in the following table.
| This field | Holds this information... |
|---|---|
| Person Code | The person code of the staff member undertaking the visit. Enter the person code or click the Search button to display the Staff Search window, where you can select the required contact. |
| Staff Member | The staff member’s name. |
| Visit Type | The type of visit. The options available in the drop-down list are populated from the Visit Type reference data. |
| Visit Date | The date of the visit with this organisation. This defaults to the current date. To change the date, click the Calendar button to display the calendar where you can select the required date. |
| Comments | Additional comments relating to the visit. |
-
Click Save.
The visit record is added.

