Register Review enables you to view all register events associated to a specific course, staff, room, learner or exam.
You must have the EBS4Registers licence to access Register Review.
To open the register view:
-
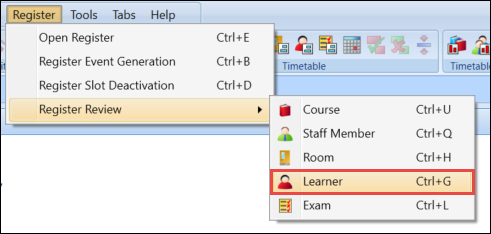
Select the relevant resource from the Register Review drop-down in the Register menu. For the purpose of this example, Learner is chosen as the resource. The same steps can be followed for each other resource.
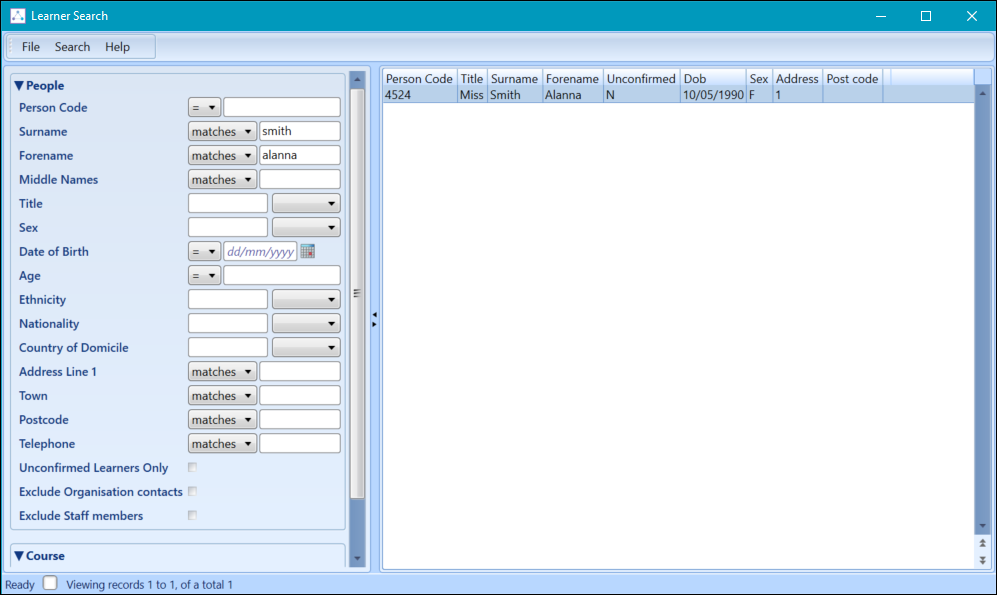
The Learner Search window is displayed.
-
Use the search filter to find the learner you want to view in Register Review.
-
Select the learner from the results list to open in Register Review.

The Register Review screen will display all registers associated with the selected room.
Use the horizontal scroll bar to display more weeks.
The fields on the Register Review screen are described in the following table:
| This field | Holds this information... |
|---|---|
| Description | The description of the register event. |
| Date | The start date of the register event. |
| Key | The register event key. |
| Start | The start time of the register event. |
| End | The end time of the register event. |
| 1-52 | Each number represents the week number of the register event. |
| Dur |
The marked duration against the resource on the register event. This includes positive marks only, negative marks will not be counted towards duration. |
| Pos | The number of positive marks against the resource of the register event. |
| Neg | The number of negative marks against the resource of the register event. |
| % Pos | The percentage of positive marks against the resource of the register event. |
By default the screen will display all registers for the current session which is set in the Options section. It is possible to amend this view using the Session and Weeks filter.
From the Register Review screen, you can:
Expanding the information bar on the register review screen will display the Week Pattern Key and the Marking Key for the chosen resource.
To expand the Information bar:
-
Click the Information arrow button at the bottom of the screen

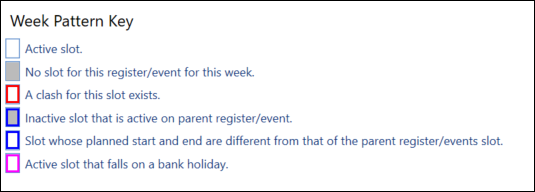
The Week Pattern Key describes each week slot display.
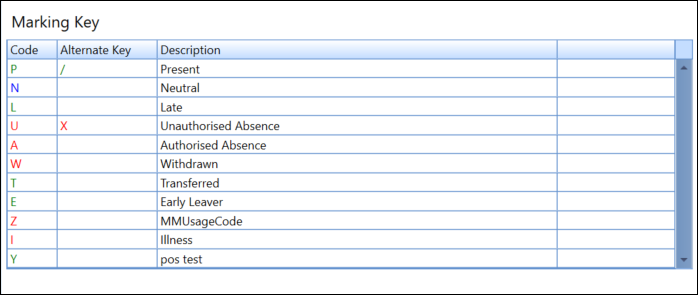
The Marking Key describes each mark for the chosen resource.
It is possible to navigate directly to the event details screen of any event shown in the review screen.
To open an event from the register review:
-
Right-click on the event and select Open Register
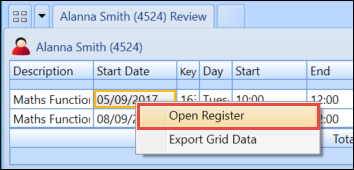
The Event Details screen will be displayed.

Using the Register Review screen you can view a range of event statistics for a specific room, staff or learner. These statistics can be viewed either per event or for all events against the resource.
It is not possible to view event statistics for courses as these do not receive a mark.
Event statistics are displayed at the right-hand side of the review screen.

The statistics against each event represent the totals for that event only.

The statistics against the Totals field represent the totals for all events displayed in the review screen.

It is possible to export the grid data shown on the register review screen and this will be saved as a .csv file.
The export will contain the following information:
- Description of each event
- Start date of each event
- Register event key
- Day of week that the event starts
- Start time of each event
- End time of each event
- Marks for each slot on the event
- Duration of marked hours
- Number of positive marks
- Number of negative marks
- Percentage of positive marks
To export the grid data:
-
Right-click on the grid and select Export Grid Data.
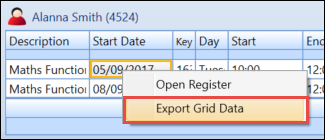
-
Name the file and save in the required location
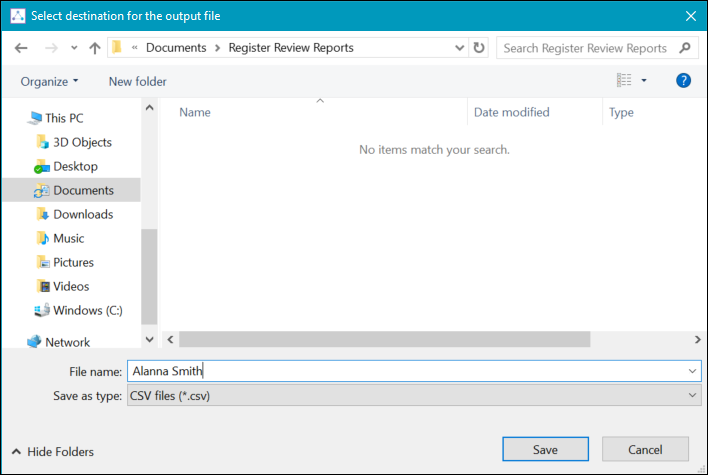
The data can be viewed in spreadsheet format.

Marking learners in the register review screen can be very useful when wanting to mark multiple registers for a particular learner at once (for example: if the learner is going to be absent for a week due to sickness, you can mark all the registers for a particular week as absent at once). This can also be useful in letting each tutor know that the learner will not be attending their lesson.
To mark a learner register in register review:
-
Select Learner from the Register Review drop-down in the Register menu.

-
Search for the required learner using the search filters.

-
Select the learner from the results list to open in register review.
-
Right-click on the relevant week and select Edit Register.

-
Enter the relevant register marks.
By default the register mark entered will fill down for all register in the chosen week; however it is possible to mark just one or some of the registers by removing marks where necessary.
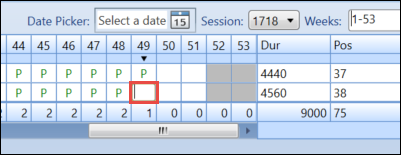
Positive marks are displayed in green and negative marks are displayed in red. Unsaved marks have a green background. Invalid marks have a red background.
-
Click the Save button to save the changes.
