ebs Client Authentication for Microsoft Entra ID and Google Workspace
You can use Microsoft Entra ID (ME-ID) or Google Workspace with OpenID Connect (OIDC) authentication to enable your users to access the ebs product suite (that is: ebs: central, ebs: shape and so on) with a single set of credentials. You can also enable dual authentication to include an additional login stage.
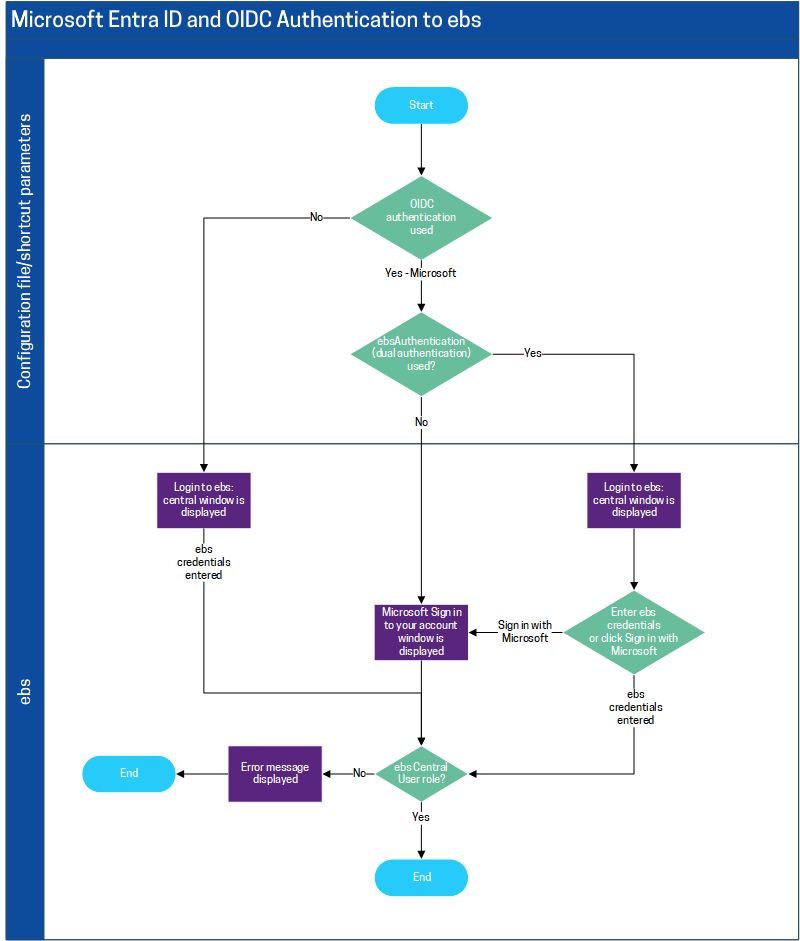
The following diagram illustrates access to ebs: central with Microsoft Entra ID and OIDC authentication.
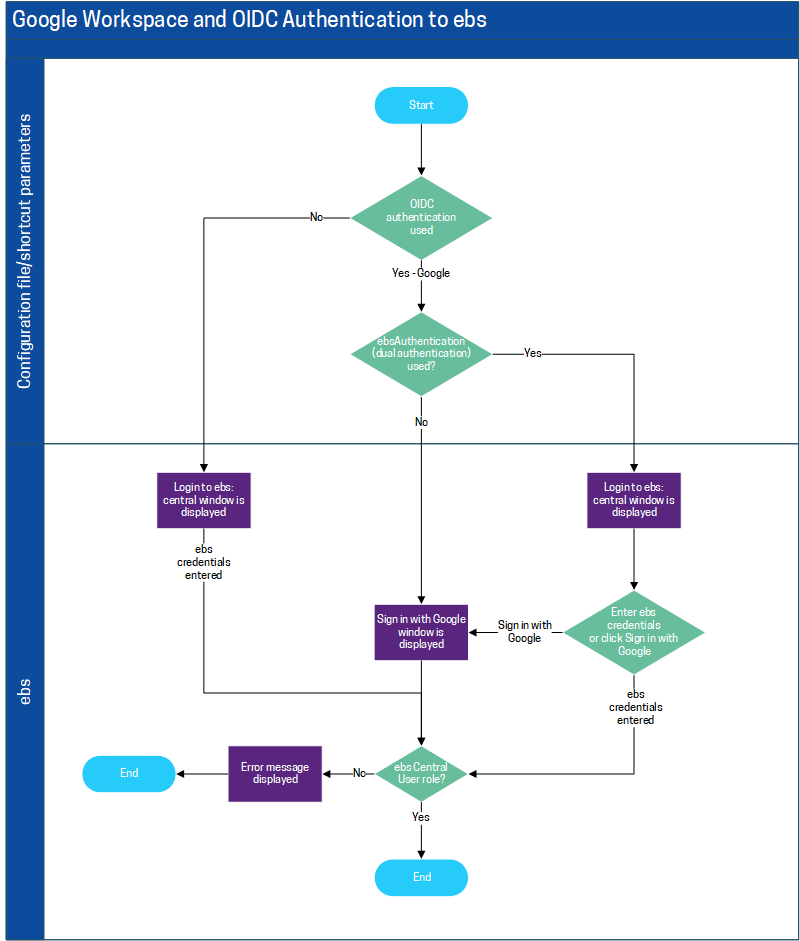
The following diagram illustrates access to ebs: central with Google Workspace and OIDC authentication.
To enable OIDC authentication:
The reference data settings for authentication are configured on the OIDC Issuers screen in reference data (accessed from the Systems ribbon).

The OIDC Issuer reference data grid contains the following fields:
-
Issuer - the relationship name (for example: AzureAD)
-
ebs Property - the ebs property description (for example: College Email, External Identifier, Person Code, User ID or Username)
-
Claim Name - the claim name (for example: preferred_username)
The institution settings for Microsoft Entra ID or Google Workspace authentication are configured on the Identity Server screen in institution settings (accessed from the Systems ribbon).
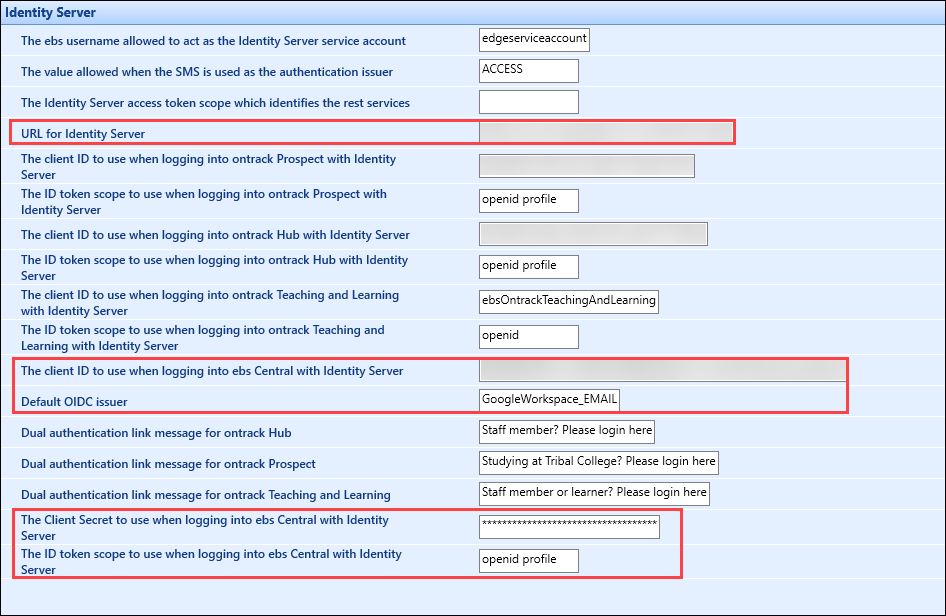
The fields on the Identity Server screen that are relevant to Microsoft Entra ID or Google Workspace authentication are described in the following table.
| This field | Holds this information... |
|---|---|
| URL for Identity Server | The URL for the Identity Server. |
| The client ID to use when logging into ebs Central with Identity Server | The client ID to use when logging into ebs: central with Identity Server. |
| Default OIDC issuer | The OpenID Connect (OIDC) issuer. |
| The Client Secret to use when logging into ebs Central with Identity Server | The client secret. |
| The ID token scope to use when logging into ebs Central with Identity Server |
The ID token scope to use when logging into ebs: central with Identity Server. This field must be set to one of the following:
|
You can configure authentication (for example: database information, whether to use dual authentication and so on) by defining the properties of the ebs shortcut parameters. Alternatively, you can use a configuration file, referenced in the properties of the ebs shortcut.
You can configure authentication in the following ways:
You can configure the shortcut used to access ebs.
To configure the shortcut:
-
Right-click the shortcut.
-
Select the Properties option.
-
Select the Shortcut tab.
-
Edit the Target field.
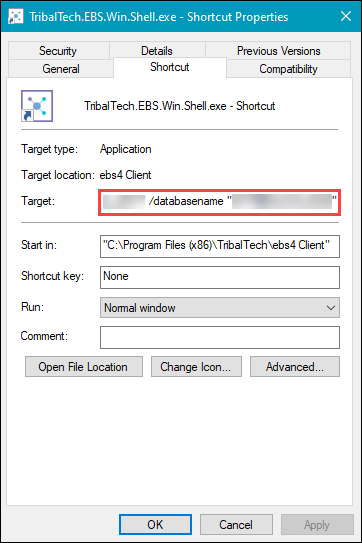
The following information must be included in the shortcut target field:
-
OIDC - the OpenID Connect type - set to /oidc microsoft or /oidc google
-
ebsAuthentication - whether to use dual authentication - set to /ebsAuthentication TRUE to enable, FALSE to disable
-
DatabaseType - the database type (for example: /databasetype SQL)
-
DatabaseName - the database name (for example: /databasename <DatabaseName>)
Note: If the DatabaseName is set to NULL, a Database field is displayed on the Login to ebs: central window where you can enter the relevant database.
-
DatabaseServername - the database server name (for example: /databaseservername <ServerName\DatabaseType>)
For example:
"C:\Program Files (x86)\TribalTech\ebs4 Client\TribalTech.EBS.Win.Shell.exe" /oidc "microsoft" /ebsAuthentication "TRUE" /databasetype "SQL" /databasename "<DatabaseName>" /databaseservername "<ServerName\DatabaseType>"
-
-
Click OK.
The target details are added to the shortcut.
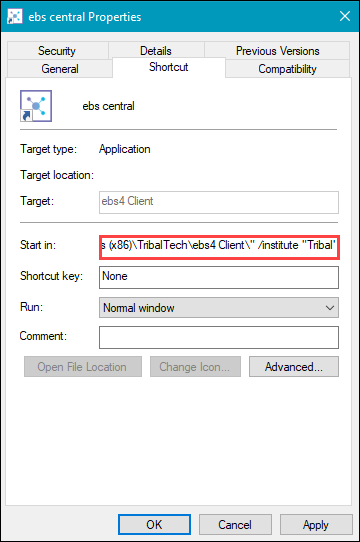
You can use a configuration (.config) file to access ebs. The config file is referenced in the properties of the ebs shortcut with the institute parameter specifying the configuration file name (for example: "C:\Program Files (x86)\TribalTech\ebs4 Client\" /institute "InstitutionName").
Note: You can encrypt a linked shortcut file. Refer to Communities for further information about encryption.
To configure the .config file:
-
Open Microsoft File Explorer.
-
Navigate to the location of the ebs installation (for example: C:\Program Files (x86)\TribalTech\ebs4 Client).
-
Create a configuration file with the relevant institution name (for example: Tribal.config).
Note: The configuration file name is referenced in the shortcut Start in: field (for example: /institute "Tribal").
-
Right-click the relevant file and open with the relevant code editor (for example: Notepad++).
The following information must be included in the .config file:
-
OIDC - the OpenID Connect type - set to microsoft or google
-
ebsAuthentication - whether to use dual authentication, set to true to enable, false to disable
-
DatabaseType - the database type (for example: sql)
-
DatabaseName - the database name
Note: If the DatabaseName is set to NULL, a Database field is displayed on the Login to ebs: central window where you can enter the relevant database.
-
DatabaseServername - the database server name
-
ebsAuthPwd - the ebsAuth user database password, only needed if you are not using the default password
Note: You only need to specify the ebsAuth user database password if you are not using the default password. It is recommended that you encrypt the configuration file if you specify the ebsAuth user database password value. Refer to Communities for further information about encryption.
For example:
<configuration>
<configSections>
<section name="CustomerSettings" type="System.Configuration.NameValueFileSectionHandler"/>
</configSections>
<CustomerSettings>
<add key="databasetype" value="sql"/>
<add key="databasename" value="DatabaseName"/>
<add key="databaseservername" value="DatabaseName\ServerName"/>
<add key="ebsauthpwd" value="<PASSWORD>"/>
<add key="oidc" value="microsoft"/>
<add key="ebsauthentication" value="true"/>
</CustomerSettings>
</configuration>
-
-
Click Save.
-
Right-click the ebs shortcut and select the Properties option.
-
Select the Shortcut tab.
-
Edit the Start in field to include the config file name (for example: "C:\Program Files (x86)\TribalTech\ebs4 Client\" /institute "Tribal").
-
Click OK.
The configuration details are added to the shortcut.
You can log in to ebs in the following ways:
You can log in to ebs with dual authentication (ebs authentication enabled or disabled in the configuration (.config) file or shortcut parameters).
Note: In this example the OIDC value is set to 'Microsoft' in the shortcut parameters or configuration file.
To log in to ebs:
-
Start ebs: central.
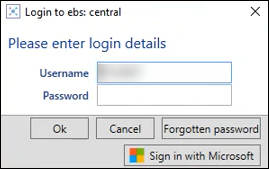
If dual authentication is enabled the Login to ebs: central window is displayed.
-
Enter login credentials and click OK. Alternatively, click the Sign in with Microsoft button.
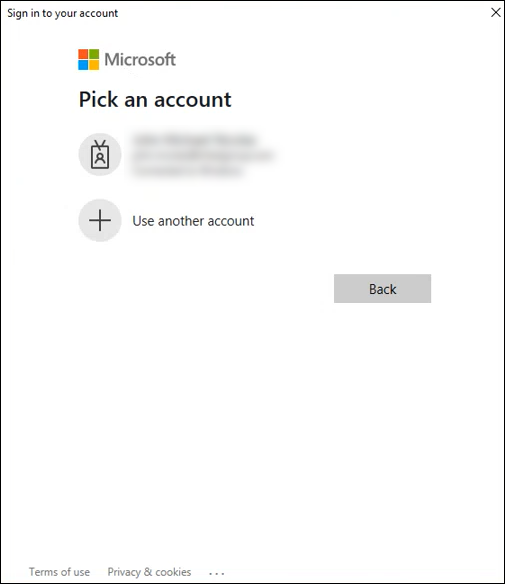
If dual authentication is disabled the Sign in to your account window is displayed.
-
Select the relevant account.
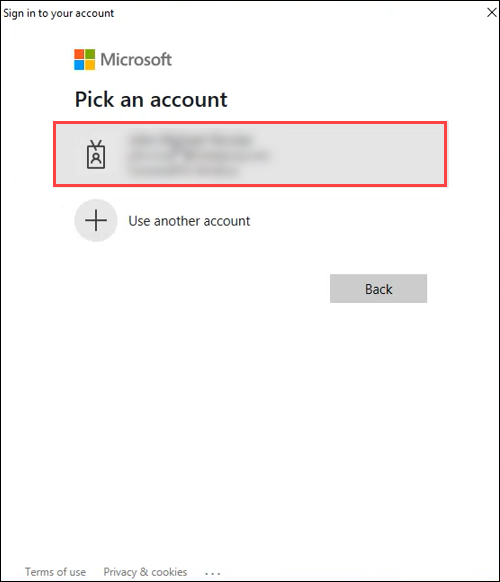
ebs: central is displayed.
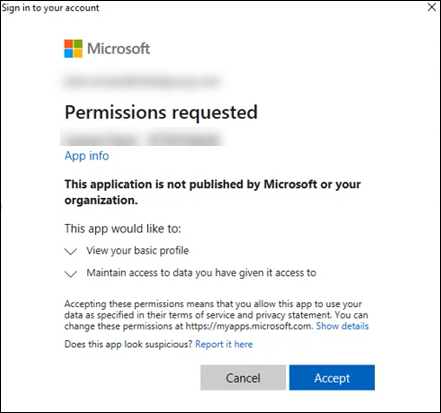
If you are accessing your account for the first time with OIDC authentication, a message is displayed.
-
Click Accept.
If there are authentication issues, an error message is displayed.
You can log in to ebs with dual authentication (ebs authentication enabled or disabled in the configuration (.config) file or shortcut parameters).
Note: In this example the OIDC value is set to 'Google' in the shortcut parameters or configuration file.
To log in to ebs:
-
Start ebs: central.
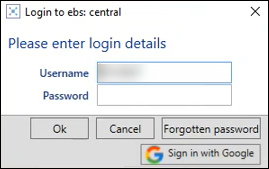
If dual authentication is enabled the Login to ebs: central window is displayed.
-
Enter login credentials and click OK. Alternatively, click the Sign in with Google button.
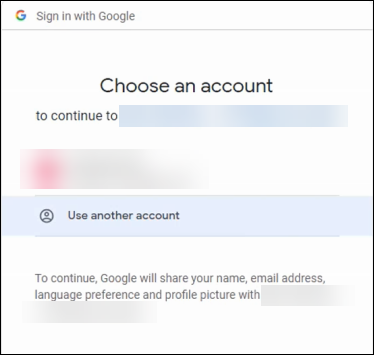
If dual authentication is disabled the Sign in with Google window is displayed.
-
Select the relevant account.
ebs: central is displayed.
-
Click Accept.
If there are authentication issues, an error message is displayed.
Note: Refer to ebs Microsoft Entra ID and Google Workspace Integration Troubleshooting for further information.