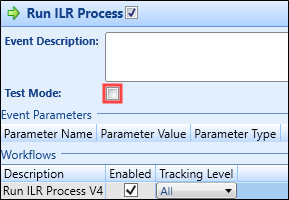
Use workflow manager to:
You can use Attach Workflow to add any existing workflow to your trigger.
To attach an existing workflow:
-
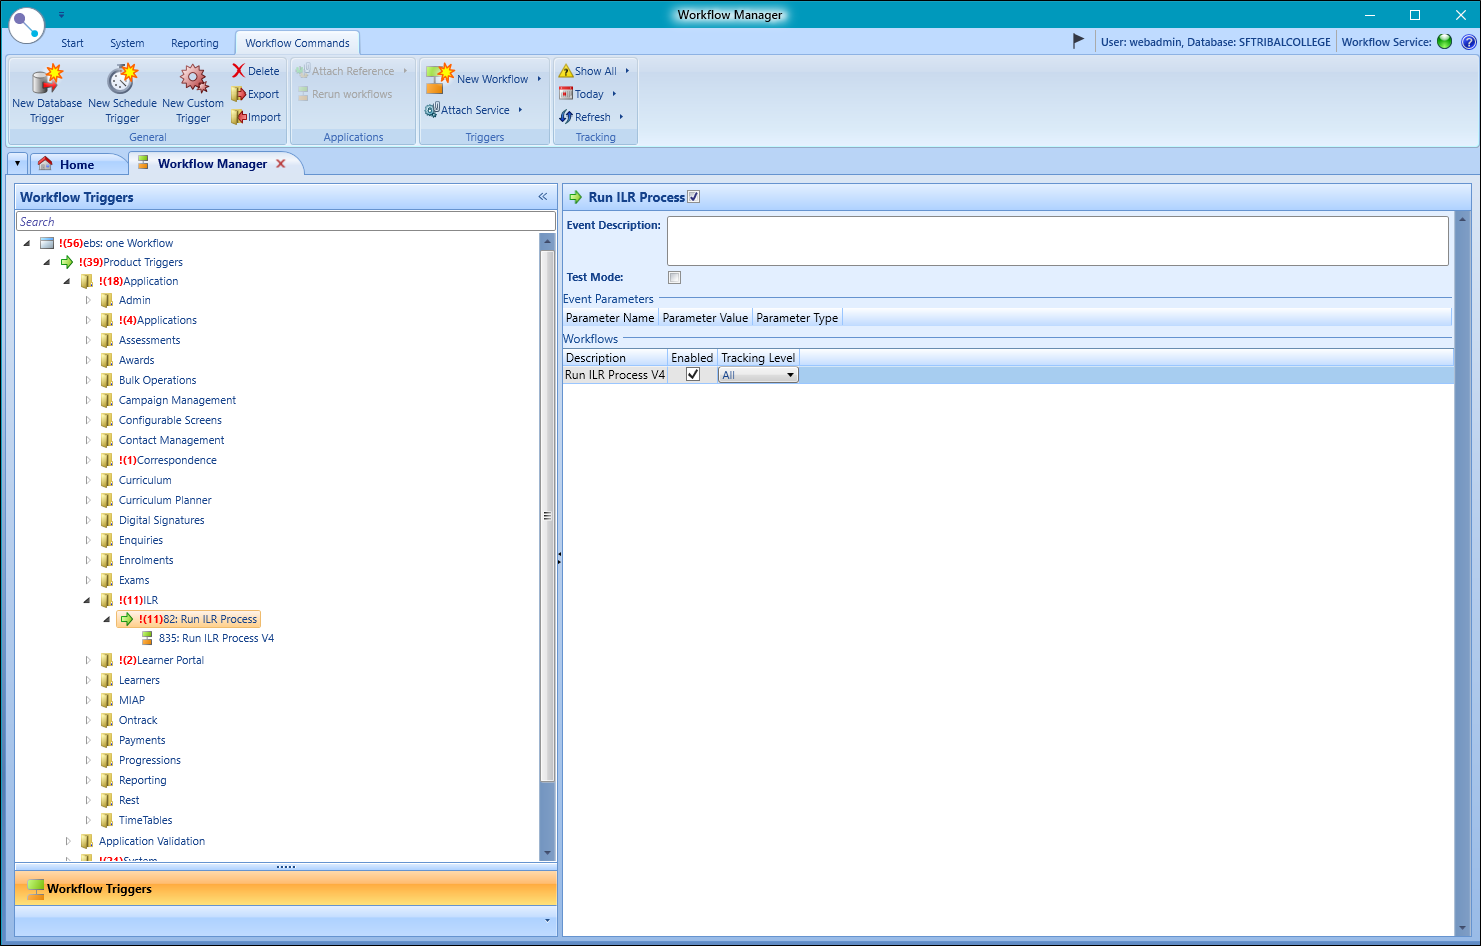
Select the relevant trigger from the Workflow Triggers section.
-
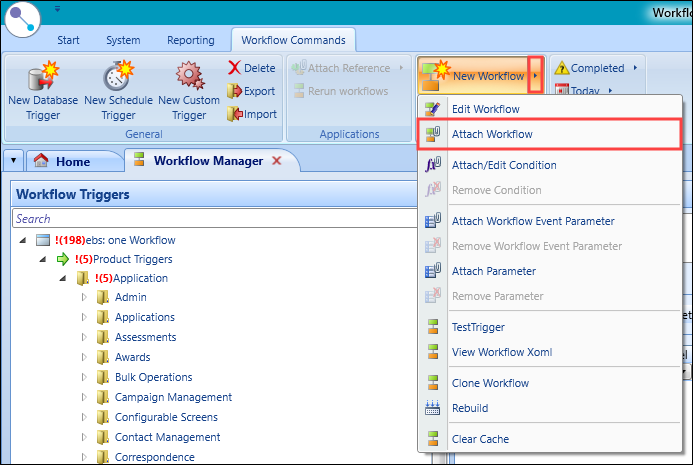
Select Attach Workflow from the 'New Workflow' drop-down list.
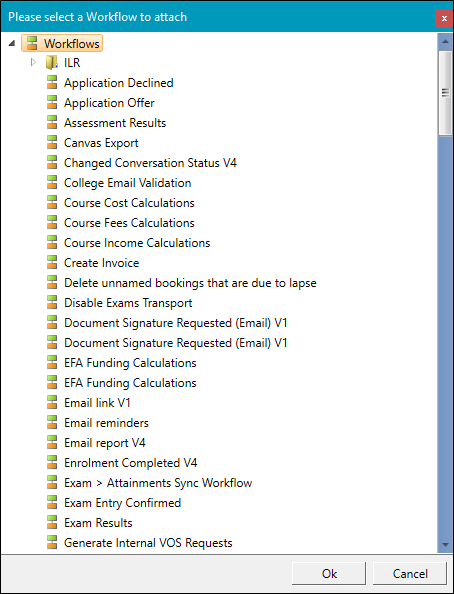
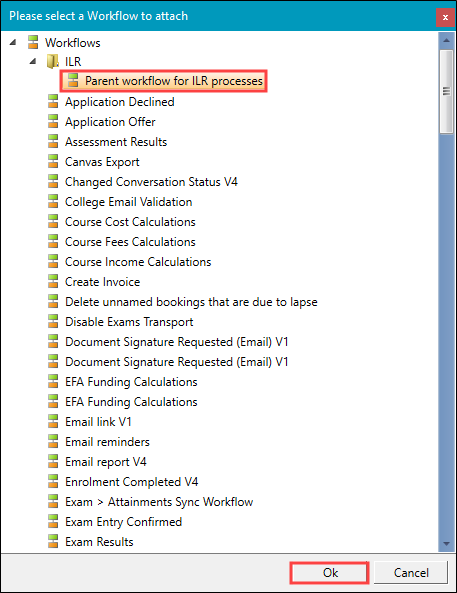
The Please select a Workflow to attach window is displayed.
-
Select a workflow from the list and then click OK.
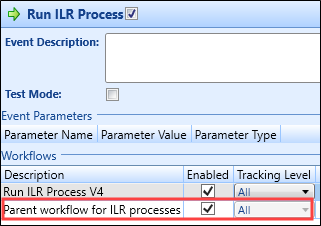
The workflow is attached to the trigger.
You can create a copy of a workflow, enabling you to add or adjust functionality without altering your original version.
To clone a workflow:
-
Select the relevant trigger from the Workflow Triggers panel.
-
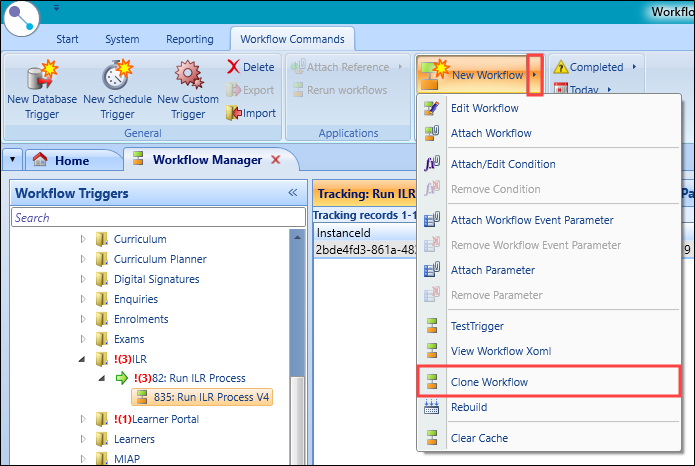
Select Clone Workflow from the 'New Workflow' drop-down list.
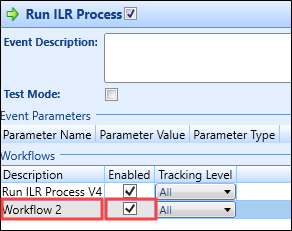
A copy of the workflow is added to the trigger.
-
Click the Description field to rename the cloned workflow.
You can disable a workflow while you modify, by removing the tick from the Enabled check box.
You can use conditions to specify when certain workflows can run (for example: only allowing a workflow to run when a specific user saves an enrolment).
When you add a condition to a workflow, which is then triggered and the condition is met, the workflow will run. If the condition is not met, then the workflow will not run and no activity will be recorded in tracking.
To add a condition:
-
Select the relevant trigger from the Workflow Triggers panel.
-
Select Attach/Edit Condition from the 'New Workflow' drop-down list.
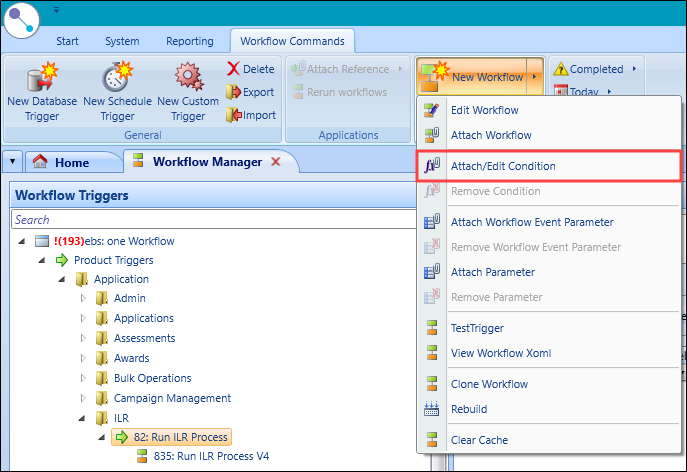
The Rule Set Editor is displayed.
-
Click the Add Rule button.
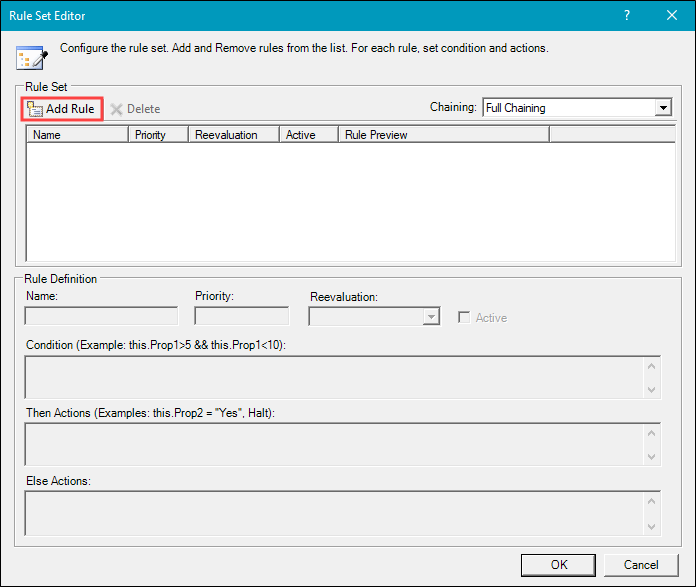
The fields available in the Rule Definition section are described in the following table.
| This field | Holds this information... |
|---|---|
| Name | The rule name. |
| Priority | The priority of the rule. |
| Reevaluation | The re-evaluation value. Select from the drop-down list, Always or Never. |
| Active | Whether the rule is active. |
| Rule Preview | The rule text. |
| Condition (Example: this.Prop1>5 && this.Prop1<10) |
The condition text. Condition text is case sensitive and should be entered in the .NET format, preferably C# (C sharp). Basic C# commands include:
The word 'this' is required if you reference a workflow. This field is mandatory and cannot be empty. The word 'this' is required if you reference a workflow. |
| Then Actions (Examples: this.Prop2 = "Yes", Halt) | The then action text. This field is not mandatory. |
| Else Actions | The else action text. This field is not mandatory. |
-
Enter the condition text into the Condition section.
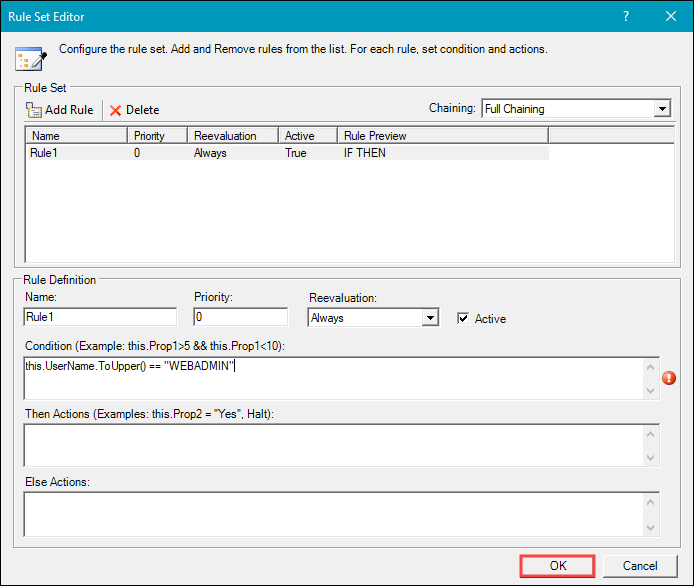
The condition is validated as text is entered with errors are indicated by an exclamation mark icon.
Conditions only have access to properties (parameters and arguments) that will be passed to workflows from the trigger.
-
Click OK.
The condition is added to the workflow, visible in the Design tab.

Refer to Manage Workflow Triggers for an example of using a workflow condition to restrict the behaviour of a database trigger.
- Select the relevant trigger from the Workflow Triggers panel.
-
Select Remove Condition from the 'New Workflow' drop-down list.
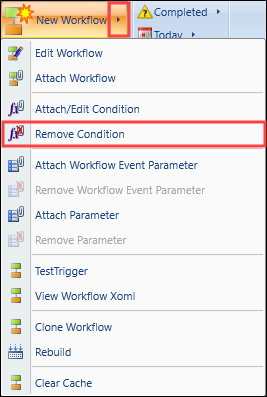
A confirmation message is displayed.

-
Click Yes.
The condition is removed from the relevant trigger and can no longer be viewed in the Workflow Triggers panel.
You can use the Export Wizard to export any existing workflow triggers and associated workflows and conditions to the Serialise (SER) file format.
To export a workflow trigger:
-
Select the relevant trigger from the Workflow Triggers panel.
-
Click the Export button on the Workflow Commands ribbon.

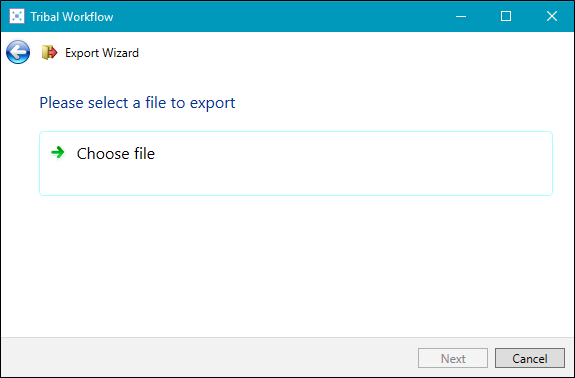
The Tribal Workflow window is displayed.
-
Click Choose file.
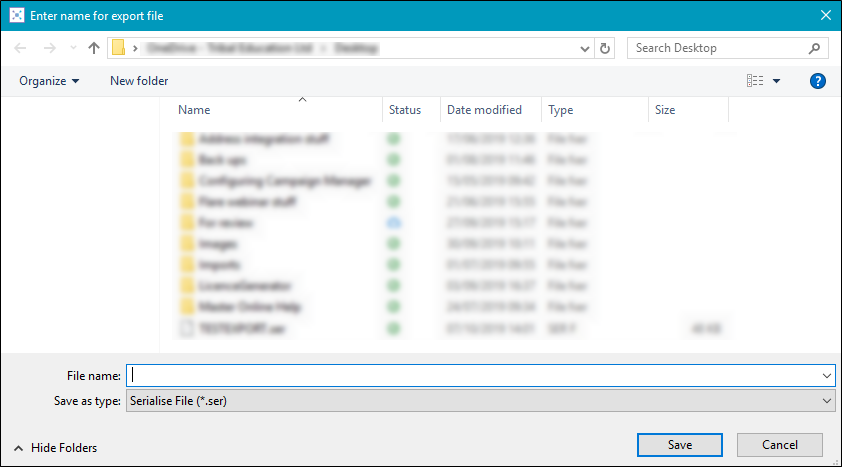
The Enter name for export file window is displayed.
-
Enter a file name and then click Save to return to the Export Wizard.
-
Click Next.
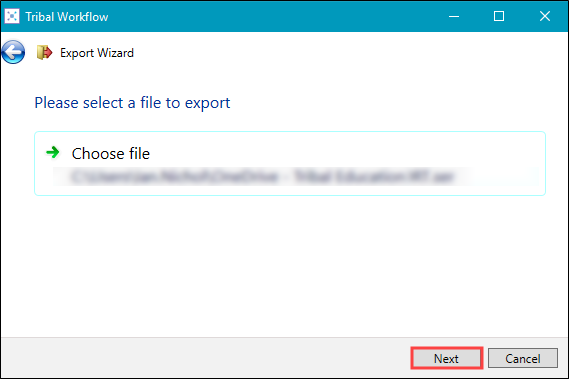
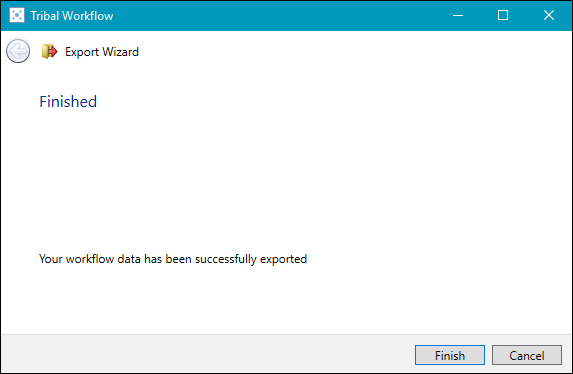
A confirmation message is displayed on completion.
-
Click Finish.
The file is exported to the SER file format.
You can use the Import Wizard to import a file in Serialise (SER) file format, including any existing workflow triggers and associated workflows and conditions.
To import a workflow trigger:
-
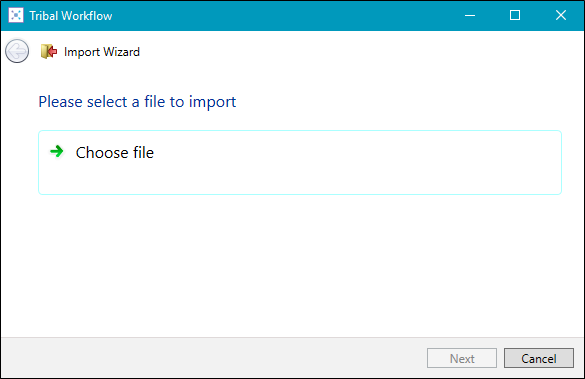
Click the Import button on the Workflow Commands ribbon.

The Tribal Workflow window is displayed.
-
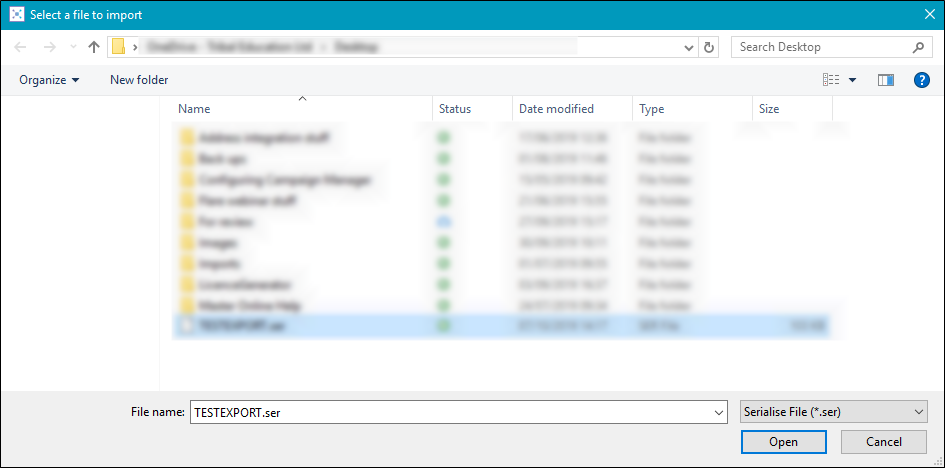
Click Choose file.
The Select a file to import window is displayed.
-
Search for and select the .SER file to import, and then click Open to return to the Import Wizard.
-
Click Next.
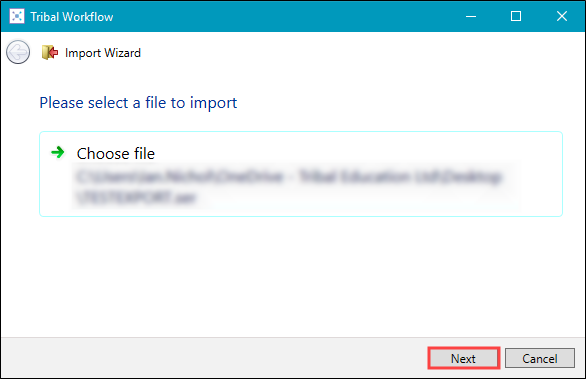
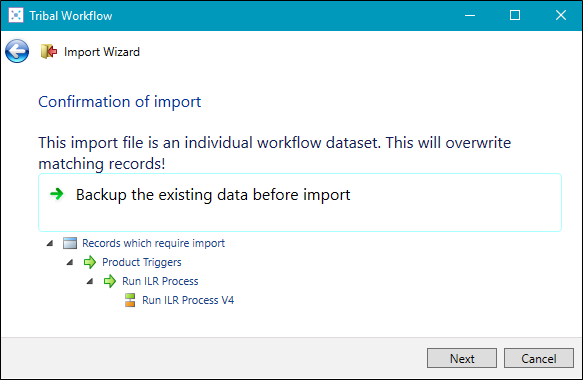
A confirmation of the import is displayed.
-
Click Backup the existing data before import if you want to make a backup in the SER file format.
Alternatively, click Next.
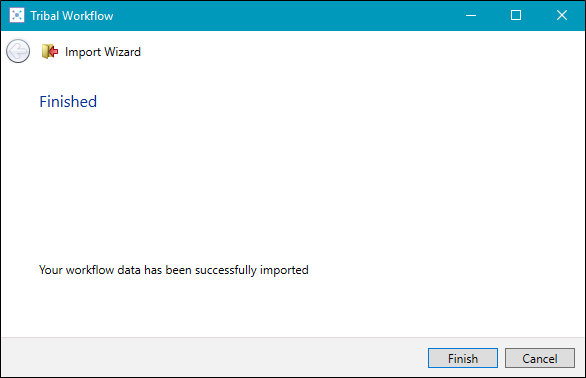
A confirmation message is displayed on completion.
-
Click Finish.
-
Select the relevant workflow from the Workflow Triggers panel.
-
The Tracking tab is displayed, containing a history for the workflow.

-
Right click the relevant tracking record and select Re-run Workflow(s) from the drop-down list.
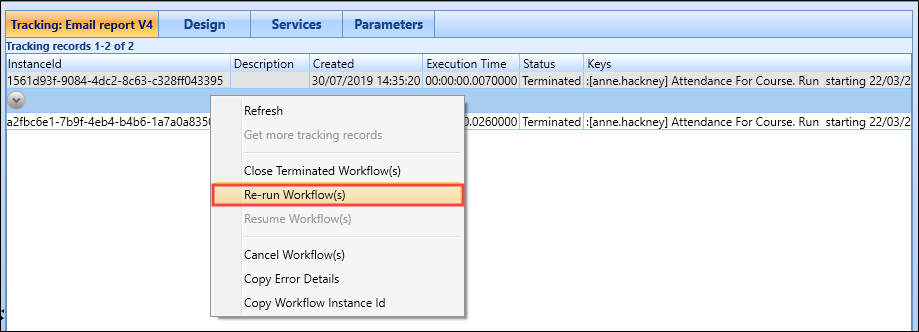
You can select multiple records using Shift-click (for a series of records), Ctrl-click (for individual records), or Ctrl-A (for all records).
Alternately, click the relevant tracking record, and select 'Rerun' from the Refresh drop-down list.

The trigger is resubmitted to the workflow queue for processing.
A confirmation message is displayed.

- Click Ok.
When you rerun a workflow, the status of the original instance is set to ClosedTerminated.
Terminated workflows are displayed at folder and trigger level within the Workflow Triggers section of the screen.
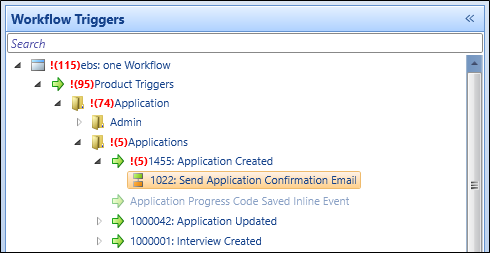
The total number of terminations is displayed at each level, for example:
- !(115) EBS one Workflow - indicates a total of 115 terminated workflows
- !(95) Product Triggers - a total of 95 terminated workflows within Product Triggers
- !(5) Applications - five terminated workflows within the Applications folder
- !(5) 1455: Applications Created - five terminated workflows within the Applications Created trigger
To view terminated workflows, select Terminated from the top tracking button.

You can learn more about a terminated workflow by clicking the arrow buttons to reveal and hide exception information.
![]()
To access Stack Trace information, right-click the exception, click Copy Error Details.
-
Right-click the relevant trigger in the Workflow Triggers panel and select Test Trigger from the drop-down menu.
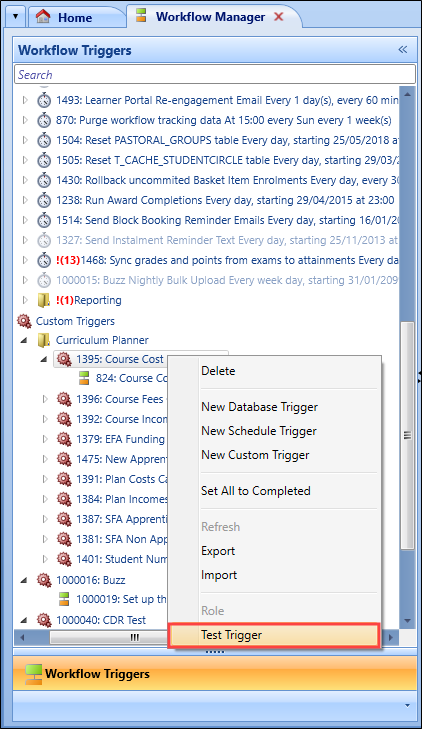
The Test Execution of Trigger window is displayed.
-
Click the relevant Value field and specify a value.
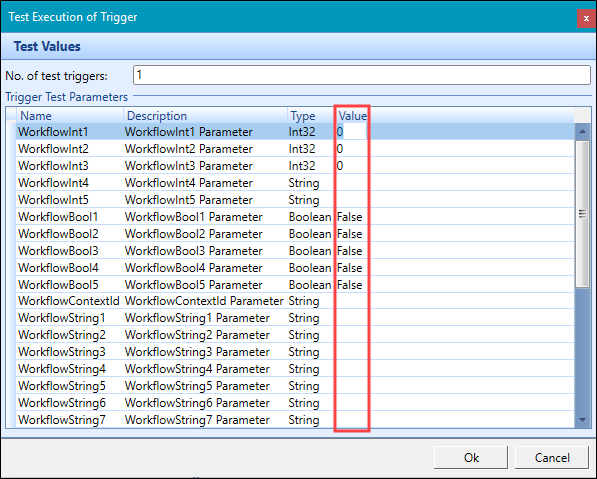
Custom triggers do not require values to be entered in order to execute.
-
Click Ok.
A confirmation message is displayed.

-
Click Ok.
The trigger is submitted to the workflow queue for processing.
Scheduled trigger can be tested by setting the WorkflowDateTime1 value to the desired execution time (for example: set 01/08/2019 09:00:00 to schedule a trigger at 9:00 AM on 1st August 2019).
You can test workflows that are attached to database or product triggers by performing an action that activates the trigger.
To trigger a workflow:
-
Select the relevant trigger from the Workflow Triggers panel.
-
Ensure that the workflow is set to Enabled, unchecked workflows are not actioned.
Check the level of tracking applied is sufficient.
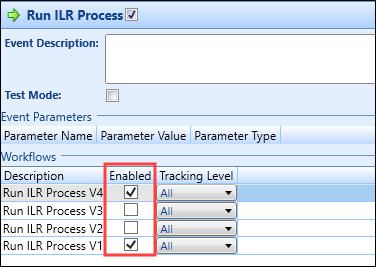
You can now perform the relevant action to trigger the workflow.
