A screen in Ontrack Designer is a container for the actual pages that users see in Ontrack Staff Hub and Ontrack Learner Hub. A screen represents a collection of pages, and can contain many pages, each tweaked slightly to suit a different set of users.
For example: two users can navigate to the Homepage screen. User A (a member of the admin team) would see a page called Homepage_Admin, tailored to suit administrators, and User B (a senior manager) would see a separate page called Homepage_SMT, tailored to suit the senior management team. Both are technically the same screen, but each user sees a different page. For each user, only one set of pages throughout the system will be visible.
The screen name is used to specify navigation links for a given primary role.
There are two ways in which a user can add a new page:
- If the page is similar to an existing page but you wish to make some minor changes, the recommended method is to copy an existing page (a base page or a page you have previously created) and then modify the copied page
- If the new page is not similar to an existing page, the recommended method is to add a new page
When configuring screens in Ontrack Designer, you can:
-
Click the Add Page button on the System Configuration Commands ribbon.

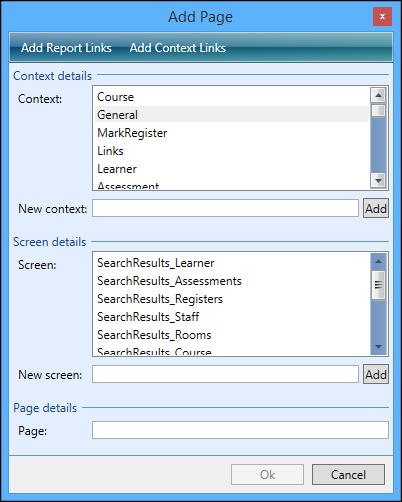
The Add Page window is displayed.
-
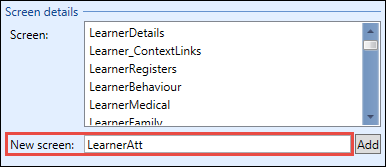
Enter the name of the new screen in the New Screen field of the Screen Details section.
-
Click the Add button to add the new screen to the list of screens.
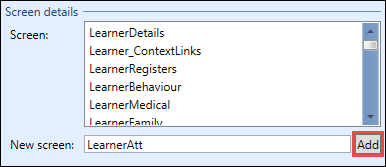
The system will automatically populate the Page name.
-
Amend the name of the page in the Page field of the Page Details section.

-
Click OK to create the screen and page.
The screen and page are added.
You will be taken to the new page and can start configuring. The system will automatically create an AccessDenied page for the screen, and all primary roles will be linked to this by default.

To add a new page to an existing screen:
-
Click the Add Page button on the System Configuration Commands ribbon.

The Add Page window is displayed.

-
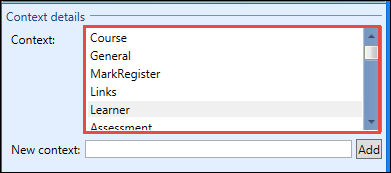
Select the context you want the new page to be linked to from the Context list.
-
Select the screen you want the new page to be linked to from Screen list.
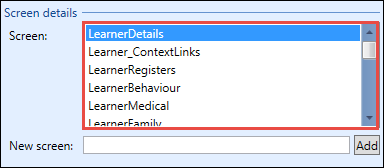
The system will automatically populate the Page name.
-
Amend the name of the page in the Page field in the Page details section.

-
Click OK to add the page to the selected screen.
The page is added to the selected screen.
When creating a new version of an existing screen, it is often quickest to create a copy of one of the existing pages for the screen (for example: if creating a new version of the homepage).
To copy a page, select the existing page, and then click the Copy Page button on the System Configuration Commands ribbon.
Only published pages can be copied.

This will display the following message.
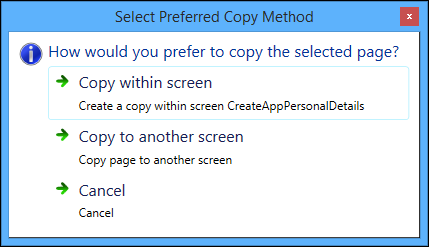
You can then select one of the following options:
- Copy within screen - this is the default option and creates a copy of the page in the existing screen
-
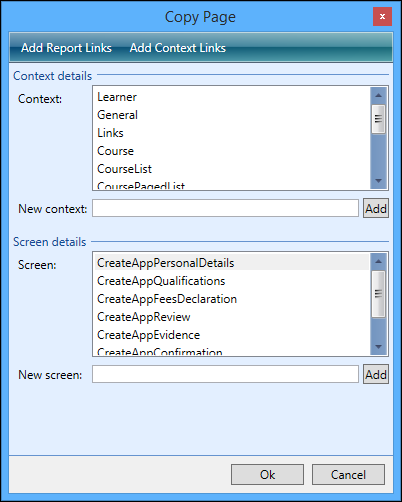
Copy to another screen - this displays an additional window where you can set the required context and screen details and page name to copy the page to another screen
The default values are the current context/screen details and page. You can change the page name after the copy has taken place.
Roles enable you to set the pages Agent Primary Roles can see. To link a page to a primary role, select the role for the page using the radio buttons.
In the example below, HomePage has been linked to the Course Team Leader role, while users with all other primary roles will see the HomePage_copy page.

Data links are stored SQL statements which are used to populate the page with data. Each control or column can be linked to one data link only.
Data links can be static or dynamic. A static data link is an SQL statement hardcoded to always run the same query. It should not be assumed that this will always return the same results, as the data in the database can change. It will, however, always run the same query.
Dynamic data links use a parameter that is passed to it by another screen, causing the SQL to be regenerated every time the data link is loaded, potentially making the data link results different every time it is run.
The formatting of data should be done in the data link’s SQL statement itself (for example: ToChar(DATE_OF_BIRTH)), as there are no data formatting options in the page configuration process.
You cannot use semi-colons in the SQL code.
Use the following to:
Static data links are fixed pieces of SQL, which will always return the same data. An example static data link would be:
SELECT
distinct(v.low_value) AS code,
v.fes_long_description AS description
FROM
verifiers v
INNER JOIN organisation_units ou ON (ou.organisation_type = v.low_value AND
ou.internal_or_external = 'INTERNAL')
WHERE
ot.rv_domain = 'ORG_TYPE'
ORDER BY ot.fes_long_description
In this example, there are no dynamic parameters in the WHERE clause, meaning that the SQL will be the same every time it runs. Unless the underlying data in the database tables changes, the results will always be the same.
Dynamic data links are modified every time the page loads, using the parameter that is passed to the page to modify the query each time (for example: passing a different PERSON_CODE to the LearnerSearch_Results page after every learner search, changing the WHERE PERSON_CODE = clause when the search results page containing the data link is loaded).
An example dynamic data link would be:
SELECT
ou.fes_full_name AS org_name,
ou.organisation_code AS org_code,
ou.fes_full_name AS description,
p.forename||' '||p.surname AS dept_head
FROM
organisation_units ou
LEFT OUTER JOIN people p ON (p.person_code = ou.fes_department_head)
WHERE
ou.internal_or_external = 'INTERNAL'
AND ou.organisation_code = {OrgCode}
You cannot use semi-colons in the SQL code.
The parameter name (OrgCode in the example above), should always be the name of the parameter linked to the screen. The naming convention adopted by Tribal for parameter naming is to concatenate sentence case words (for example: PersonDetails), rather than using underscores (for example: Person_Details). It is recommended that institutions adopt the same convention for reasons of consistency and clarity.
The following built-in parameters can be used to get information about the currently logged in user and various institution/product settings:
- {global:personcode}
- {global:username}
- {web_config:INST_TYPE} - can be used for any web_config parameter
- {global:IsActive}
- {global:CurrentYear}
The following built-in parameters can be used to get information about the currently logged in user and various institution/product settings.
-
{web_config:parameter} or {institution_details:parameter} retrieves the value for any web_config setting. This can be used for any web_config parameter.
For example: <code>{web_config:inst_type} will retrieve the parameter value for INST_TYPE from the WEB_CONFIG table.
This provider is case insensitive when parsing the token name (that is: parameter). The institution will be cached in memory in advance for environments without a multi-context licence. For multi-context environments, the settings are cached on demand on the first time they are queried.
-
{global:<token name>} is used to retrieve information relevant to the user's current session. Tokens are described in the following table.
| Token Name | Does this... |
|---|---|
| currencysymbol | {global:currencysymbol} returns the currency symbol used for the institution type's culture. |
| currentyear |
{global:currentyear} can be used in datalink queries to only include records relevant to the current year. It can also be used in datalink queries to determine whether blank registers should be displayed in OnTrack. This token cannot be used in Screen Manager. |
| isactive |
{global:isactive} can be used in datalink queries to only include active records . This token cannot be used in Screen Manager. |
| personcode | {global:personcode} can be used to retrieve the user's person code from the CurrentPrincipal (in Central) or HTTP session (for web services). |
| shortdateformat | {global:shortdateformat} returns the short date format used for the institution type's culture. |
| username |
{global:username} can be used to retrieve the user's name. This value can vary depending on:
|
| AUS defaultregioncode | {global:defaultregioncode} can be used to get the region code (organisation code) for the user's default region. |
| AUS defaultregionid |
{global:defaultregionid} can be used to get the region ID (organisation ID) for the user's default region. It can also be used to get the region name for the user's default region. The region name is evaluated by coalescing FES_FULL_NAME, FES_SHORT_NAME and ORGANISATION_CODE for a region. |
-
Select the page you want to add a data link to.

-
Click the Add Data Link button on the System Configuration Commands ribbon.

The new data link will be displayed in the Data Link Details section.
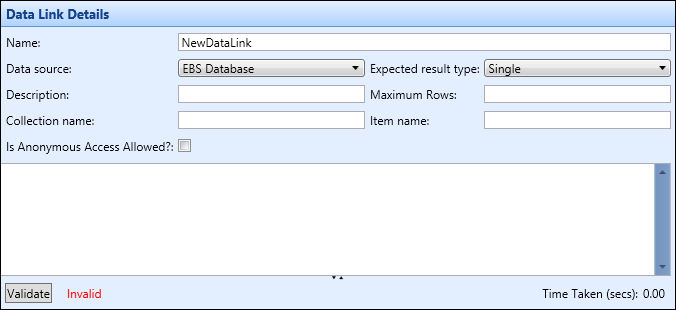
- Enter the details of the new data link.
The fields in the Data Link Details section are described in the following table.
| This field | Holds this information... |
|---|---|
| Name | The name of the data link. |
| Data source | The data source containing the data you want to display. See Manage Data Sources for more information. |
| Expected result type | Whether the query will return a single row or multiple rows of data. The choice made here will determine the icon used to represent the data link (either a single column or two columns). This allows you to see the different types of data links at a glance. |
| Description | The description of the data link. |
| Maximum Rows | The maximum number of rows to return from the data link. If left blank, the query will return an unrestricted number of rows. |
| Collection name |
The collection name which is used to change the xml entity surrounding data that is returned from the REST service (for example: this is the data returned from a data link called persondetails where collection name has been set to 'PersonDetails'). This could be used if calling REST services directly (for example: outside of Ontrack). |
| Item name |
The item name which is used to change the xml entity surrounding data that is returned from the REST service (or example: this is the data returned from a data link called persondetails where item name has been set to 'ColumnName'). This could be used if calling REST services directly (for example: outside of Ontrack). |
| Is Anonymous Access Allowed? |
Whether to allow anonymous access to data (that is: make data available without authentication). This check box is not set by default, including for any existing data links in the system. It is recommended to use this functionality with caution (that is: only expose data that is appropriate to potentially be available publicly). |
-
Click the Save button.
The new data link is saved to the page.
Validating the data link enables you to check whether the SQL in the data link works.
To validate a data link:
-
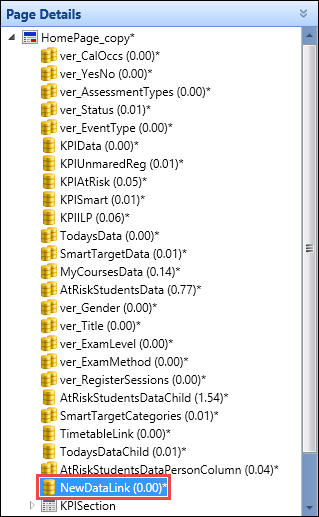
Select the data link in the Page Details section.
-
Click the Validate button in the SQL query section.
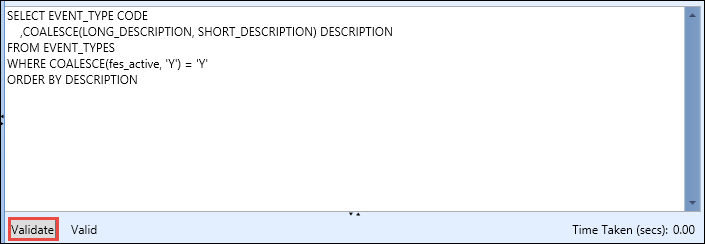
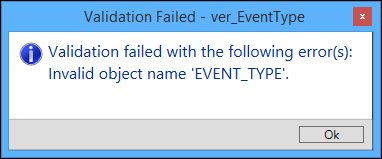
The data link will be flagged as invalid if the SQL query contains errors. You will receive an error message informing you why the query could not be validated.
You cannot use semi-colons in the SQL code.
When you have created the new page you can amend how the screen is displayed to the users.
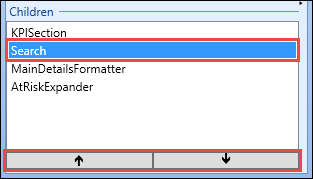
Page layouts consist of the different controls that you add from the System Configuration Commands ribbon and can be ordered on the screen from the Children grid in the Page Layout Details section.
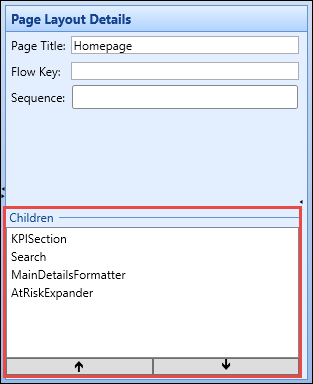
To change the page layout, select the control you want to move in the grid and then use the up and down arrow buttons to amend the layout.
