The system restricts the application of credit notes to invoiced fees. Uninvoiced fees can be adjusted by changing the fee amount manually, subject to the role-restrictions for fees, which has the same effect as adding a credit note.
From the Credit Notes tab, you can:
To create a credit note:
-
Select the required invoiced fees in the Fees grid or required invoices in the Invoices grid.
Credit notes added in this way apply to either the selected fees, or the fees associated with the selected invoices. Credit notes can also be added when no fees or invoices are selected, and apply to all invoiced fees and are referred to as open credit-notes.
-
Click the Credit button on the Payments ribbon.

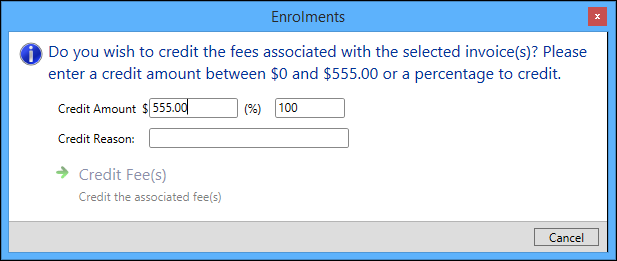
The Credit Note window is displayed.

- Enter a credit amount and credit reason.
-
Click the Credit Fee(s) button.
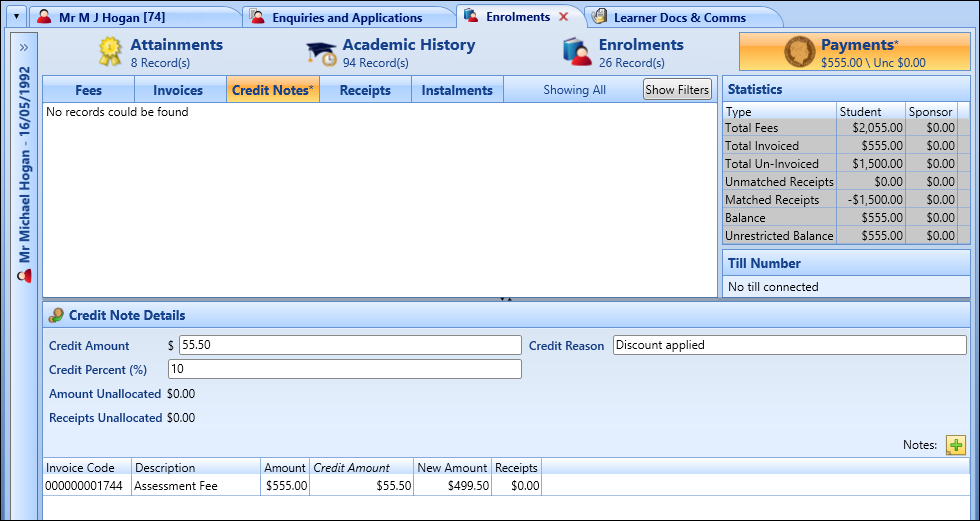
The Credit Notes tab is displayed with the details of the credit note.

-
Click Save.
The credit note record is created and displayed in the grid.

The system allows the insertion of a manual credit-amount allocation step into the process of adding a credit note so that you can adjust the amounts manually before saving credit notes.
When submitting the credit-note amount, the Credit Notes tab is displayed, which displays the details of the pending credit note, the associated fees, and the amount of credit to be allocated to each.
You can then change the default amount allocation manually before saving the credit note. Use the Recalculate Total button on the Payments ribbon to recalculate the credit note amount so that it equals the sum of the amounts specified against each fee (and the opposite using the Recalculate Fees button).

You cannot increase the credit note amount beyond the sum of the current amounts of all invoiced fees for the learner (that is: the sum of all invoiced fees less any previous adjustments and credit notes).
When crediting an invoice below the total amount of the receipts matched to fees paid against the invoice, you can choose from the following options:
- Leave the matching information as it is
- Unmatch the receipts then partially rematch them to pay the new fee amounts in full
If the second option is chosen, the system unmatches any receipts that have been matched to the fees associated with the invoice, credits the invoice by the amount specified, and then re-matches the receipts across the new fee amounts.
The system rematches the receipts starting with the oldest non-StudyLink receipt, through to the newest non-StudyLink receipt, then the oldest StudyLink receipt through to the newest StudyLink receipt.
Any leftover receipt amounts remain against the learner as unmatched payments.
To cancel a credit note:
-
Click in the (select) column of the required credit note to turn the N to Y.

-
Click the Cancel Credit button on the Payments ribbon.

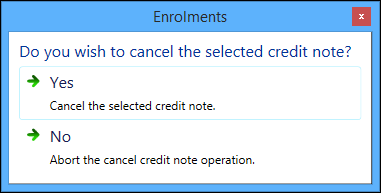
A message is displayed.

- Click Yes to confirm you want to cancel the credit note.
-
Click Save.
The credit note is cancelled, and the original credit note displayed in the Credit Notes grid with the status of ‘Cancelled’. The credit note is reversed and the original fees are re-created and associated with the invoice.

To print a credit note:
-
Click in the (select) column of the required credit note to turn the N to Y.
You can only print one credit note at a time.

-
Click the Credit Note button in the Reports group of the Payments ribbon.

The credit note is automatically sent to your default system printer.