Use the Child Exam Entries screen to manage child exam entries. A child exam is usually a unit or paper (or a number of units and papers) that is taken by the candidate in order to achieve the overall award (that is: the parent exam entry).
To view or edit child exam entries:
-
Select Child Exam Entries from the Grids pane.
-
Use the Condition Builder to locate a child exam entry.
If required, you can navigate to the Learner Details or Grids screens relating to a child exam entry by select and hold (or right-click)ing on the relevant record and using the Go To functionality. Refer to Use the Go To Functionality for further information.
The Child Exam Entry Details section is displayed.
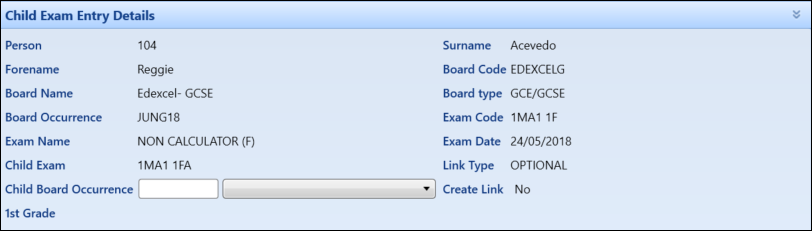
The fields in the Child Exam Entry Details section are described in the following table.
| This field | Holds this information... |
|---|---|
| Person | The candidate's person code, as defined in Central. |
| Surname | The learner's surname. |
| Forename | The learner's forename. |
| Board Code | The exam board code. |
| Board Name | The exam board name. |
| Board Type | The exam board type. |
| Board Occurrence | The user-defined exam board occurrence code. |
| Exam Code | The user-definable exam code for this examination, subject, paper, and so on. |
| Exam Name | The user-definable exam name for this examination, subject, paper, and so on. |
| Exam Date | The date of the exam. |
| Child Exam | The code of the child exam. |
| Link Type | Whether the link is compulsory or optional. |
| Child Board Occurrence | The user-defined exam board occurrence code of the child. |
| Create Link | Whether to create a linked child exam entry for the selected learner(s). This is based on the link between the parent and child exams, as defined on the Exam Links page. |
| 1st Grade |
A drop-down containing grade data which can be entered at the same time as a record is created. This drop-down can only be selected from when the Create Link check box is selected. |
- Make any required changes to the record.
- Select the Save button to save the record.